VIDEO CLIPS 6d
Shaolin in Portugal 2010 (Cont)
 Shaolin in Portugal 2010 -- Shaolin 04
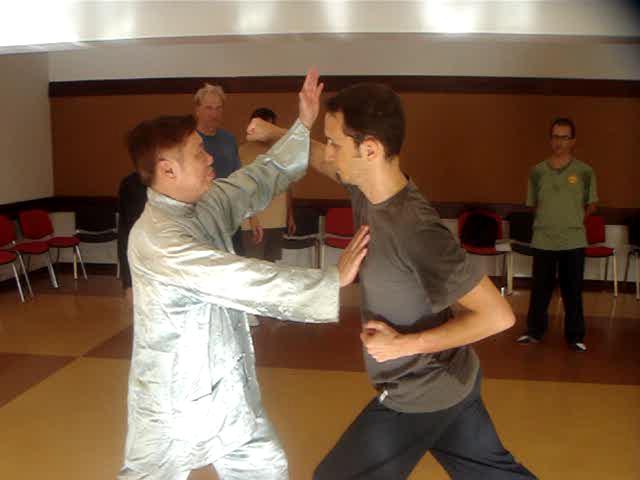
Intercepting Boxers' Hooks -- Part 1
Shaolin in Portugal 2010 -- Shaolin 04
Intercepting Boxers' Hooks -- Part 1Intercepting Boxers' Hooks -- Part 2
Intercepting Boxers' Hooks -- Part 3
Intercepting Boxers' Hooks -- Part 4
Intercepting Boxers' Hooks -- Part 5
Intercepting Boxers' Hooks -- Part 6
Intercepting Boxers' Hooks -- Part 7
Intercepting Boxers' Hooks -- Part 8
Intercepting Boxers' Hooks -- Part 9
Do you Know why it is Easier to Defeat a Kick-Boxer than a Boxer? -- Part 1
Do you Know why it is Easier to Defeat a Kick-Boxer than a Boxer? -- Part 2
Do you Know why it is Easier to Defeat a Kick-Boxer than a Boxer? -- Part 3
Do you Know why it is Easier to Defeat a Kick-Boxer than a Boxer? -- Part 4
Do you Know why it is Easier to Defeat a Kick-Boxer than a Boxer? -- Part 5
Do you Know why it is Easier to Defeat a Kick-Boxer than a Boxer? -- Part 6
Do you Know why it is Easier to Defeat a Kick-Boxer than a Boxer? -- Part 7
Do you Know why it is Easier to Defeat a Kick-Boxer than a Boxer? -- Part 8
Countering at Various Points at a Series of Attacks -- Part 1
Countering at Various Points at a Series of Attacks -- Part 2
Countering at Various Points at a Series of Attacks -- Part 3
Countering at Various Points at a Series of Attacks -- Part 4
Countering at Various Points at a Series of Attacks -- Part 5
Countering at Various Points at a Series of Attacks -- Part 6
Countering at Various Points at a Series of Attacks -- Part 7
Countering at Various Points at a Series of Attacks -- Part 8
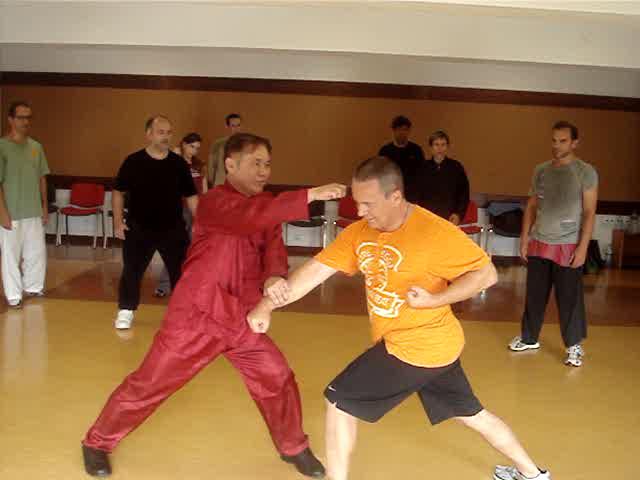
Tactic of Cover and Strike against Karate -- Part 1
Tactic of Cover and Strike against Karate -- Part 2
Tactic of Cover and Strike against Karate -- Part 3
Tactic of Cover and Strike against Karate -- Part 4
Tactic of Cover and Strike against Karate -- Part 5
 Tactic of Cover and Strike against Karate -- Part 6
Tactic of Cover and Strike against Karate -- Part 7
Tactic of Cover and Strike against Karate -- Part 8
Giving or Not Giving Opponents Fighting Chance -- Part 1
Giving or Not Giving Opponents Fighting Chance -- Part 2
Giving or Not Giving Opponents Fighting Chance -- Part 3
Giving or Not Giving Opponents Fighting Chance -- Part 4
Giving or Not Giving Opponents Fighting Chance -- Part 5
Giving or Not Giving Opponents Fighting Chance -- Part 6
Giving or Not Giving Opponents Fighting Chance -- Part 7
Giving or Not Giving Opponents Fighting Chance -- Part 8
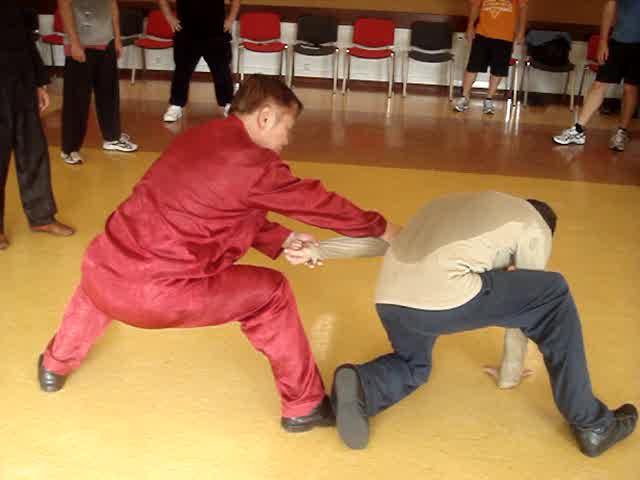
Applying Chin-Na against Karate Exponents -- Part 1
Applying Chin-Na against Karate Exponents -- Part 2
Applying Chin-Na against Karate Exponents -- Part 3
Applying Chin-Na against Karate Exponents -- Part 4
Applying Chin-Na against Karate Exponents -- Part 5
Applying Chin-Na against Karate Exponents -- Part 6
Applying Chin-Na against Karate Exponents -- Part 7
Applying Chin-Na against Karate Exponents -- Part 8
Applying Chin-Na against Karate Exponents -- Part 9
Class Practice against Karate Attacks -- Part 1
Class Practice against Karate Attacks -- Part 2
Class Practice against Karate Attacks -- Part 3
Class Practice against Karate Attacks -- Part 4
Class Practice against Karate Attacks -- Part 5
Class Practice against Karate Attacks -- Part 6
Class Practice against Karate Attacks -- Part 7
Class Practice against Karate Attacks -- Part 8
Class Practice against Karate Attacks -- Part 9
Class Practice against Karate Attacks -- Part 10
 Class Practice against Karate Attacks -- Part 11
Effective Techniques and Tactics against Karate -- Part 1
Effective Techniques and Tactics against Karate -- Part 2
Effective Techniques and Tactics against Karate -- Part 3
Effective Techniques and Tactics against Karate -- Part 4
Effective Techniques and Tactics against Karate -- Part 5
Effective Techniques and Tactics against Karate -- Part 6
Effective Techniques and Tactics against Karate -- Part 7
Effective Techniques and Tactics against Karate -- Part 8
Intercepting Boxers' Hooks -- Overview
Do you Know why it is Easier to Defeat a Kick-Boxer than a Boxer? -- Overview
Countering at Various Points at a Series of Attacks -- Overview
Tactic of Cover and Strike against Karate -- Overview
Giving or Not Giving Opponents Fighting Chance -- Overview
Applying Chin-Na against Karate Exponents -- Overview
Class Practice against Karate Attacks -- Overview
Effective Techniques and Tactics against Karate -- Overview
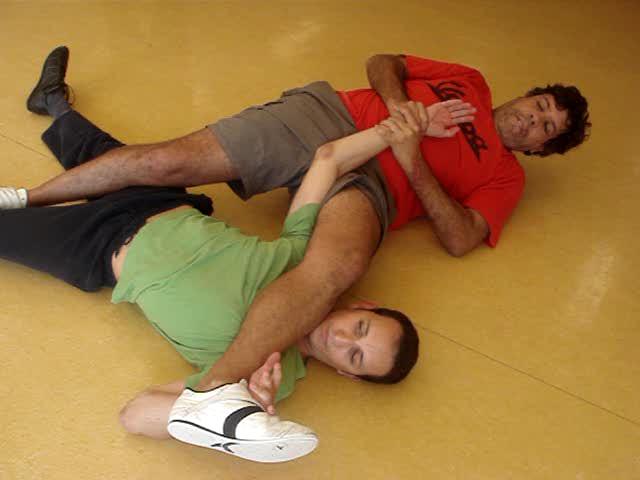
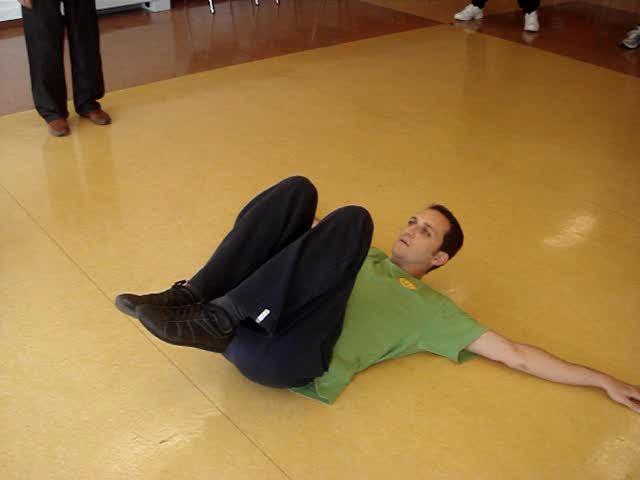
Shaolin in Portugal 2010 -- Shaolin 05 There is Ground Fighting in Shaolin Kungfu -- Part 1
There is Ground Fighting in Shaolin Kungfu -- Part 2
There is Ground Fighting in Shaolin Kungfu -- Part 3
There is Ground Fighting in Shaolin Kungfu -- Part 4
There is Ground Fighting in Shaolin Kungfu -- Part 5
There is Ground Fighting in Shaolin Kungfu -- Part 6
There is Ground Fighting in Shaolin Kungfu -- Part 7
There is Ground Fighting in Shaolin Kungfu -- Part 8
There is Ground Fighting in Shaolin Kungfu -- Part 9
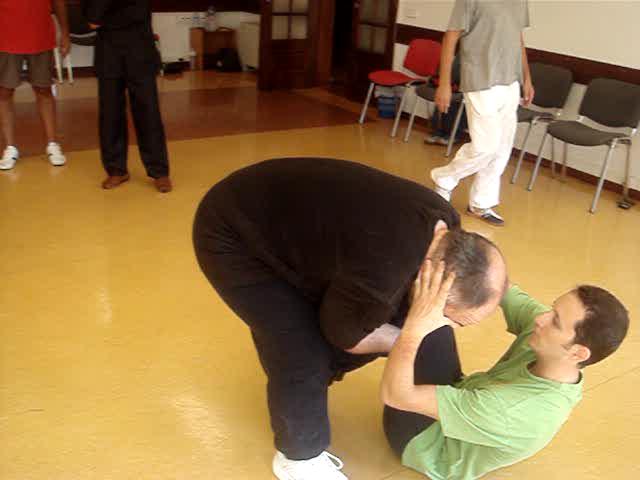
Take Down and Pin Down in Shaolin Kungfu -- Part 1
 Take Down and Pin Down in Shaolin Kungfu -- Part 2
Take Down and Pin Down in Shaolin Kungfu -- Part 3
Take Down and Pin Down in Shaolin Kungfu -- Part 4
Take Down and Pin Down in Shaolin Kungfu -- Part 5
Take Down and Pin Down in Shaolin Kungfu -- Part 6
Take Down and Pin Down in Shaolin Kungfu -- Part 7
Take Down and Pin Down in Shaolin Kungfu -- Part 8
Take Down and Pin Down in Shaolin Kungfu -- Part 9
Take Down and Pin Down in Shaolin Kungfu -- Part 10
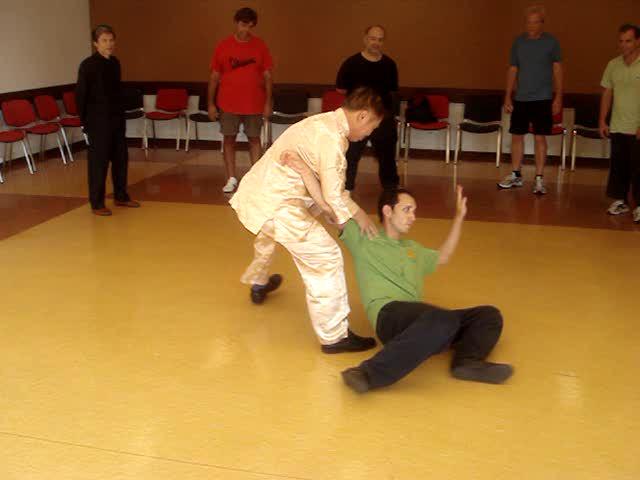
Overturning Pin-Downs even when Opponents are
Bigger-Sized -- Part 1
Overturning Pin-Downs even when Opponents are Bigger-Sized -- Part 2
Overturning Pin-Downs even when Opponents are Bigger-Sized -- Part 3
Overturning Pin-Downs even when Opponents are Bigger-Sized -- Part 4
Overturning Pin-Downs even when Opponents are Bigger-Sized -- Part 5
Overturning Pin-Downs even when Opponents are Bigger-Sized -- Part 6
Overturning Pin-Downs even when Opponents are Bigger-Sized -- Part 7
Overturning Pin-Downs even when Opponents are Bigger-Sized -- Part 8
Overturning Pin-Downs even when Opponents are Bigger-Sized -- Part 9
Countering while being Taken Down -- Part 1
Countering while being Taken Down -- Part 2
Countering while being Taken Down -- Part 3
Countering while being Taken Down -- Part 4
Countering while being Taken Down -- Part 5
Countering while being Taken Down -- Part 6
Countering while being Taken Down -- Part 7
Countering while being Taken Down -- Part 8
Countering while being Taken Down -- Part 9
Countering the Shoot at the Initial State -- Part 1
Countering the Shoot at the Initial State -- Part 2
Countering the Shoot at the Initial State -- Part 3
 Countering the Shoot at the Initial State -- Part 4
Countering the Shoot at the Initial State -- Part 5
Countering the Shoot at the Initial State -- Part 6
Countering the Shoot at the Initial State -- Part 7
Countering the Shoot at the Initial State -- Part 8
Countering the Shoot at the Initial State -- Part 9
Countering the Shoot at the Initial State -- Part 10
Countering the Shoot at the Initial State -- Part 11
Countering the Shoot at the Initial State -- Part 12
Countering the Shoot at the Initial State -- Part 13
Countering Taekwondo Kicks at Finishing Stage -- Part 1
Countering Taekwondo Kicks at Finishing Stage -- Part 2
Countering Taekwondo Kicks at Finishing Stage -- Part 3
Countering Taekwondo Kicks at Finishing Stage -- Part 4
Countering Taekwondo Kicks at Finishing Stage -- Part 5
Countering Taekwondo Kicks at Finishing Stage -- Part 6
Countering Taekwondo Kicks at Finishing Stage -- Part 7
Countering Taekwondo Kicks at Finishing Stage -- Part 8
Countering Taekwondo Kicks at Finishing Stage -- Part 9
Countering Taekwondo Kicks at Intermediate Stage -- Part 1
Countering Taekwondo Kicks at Intermediate Stage -- Part 2
Countering Taekwondo Kicks at Intermediate Stage -- P art 3
Countering Taekwondo Kicks at Intermediate Stage -- Part 4
Countering Taekwondo Kicks at Intermediate Stage -- Part 5
Countering Taekwondo Kicks at Intermediate Stage -- Part 6
Countering Taekwondo Kicks at Intermediate Stage -- Part 7
Countering Taekwondo Kicks at Intermediate Stage -- Part 8
Countering Taekwondo Kicks at Intermediate Stage -- Part 9
It's Easy to Counter Kicks, If you Know How -- Part 1
It's Easy to Counter Kicks, If you Know How -- Part 2
It's Easy to Counter Kicks, If you Know How -- Part 3It's Easy to Counter Kicks, If you Know How -- Part 4
It's Easy to Counter Kicks, If you Know How -- Part 5
It's Easy to Counter Kicks, If you Know How -- Part 6
It's Easy to Counter Kicks, If you Know How -- Part 7
It's Easy to Counter Kicks, If you Know How -- Part 8
It's Easy to Counter Kicks, If you Know How -- Part 9
Countering Taekwondo Kicks at the Initial Stage -- Part 1
Countering Taekwondo Kicks at the Initial Stage -- Part 2
Countering Taekwondo Kicks at the Initial Stage -- Part 3
Countering Taekwondo Kicks at the Initial Stage -- Part 4
Countering Taekwondo Kicks at the Initial Stage -- Part 5
Countering Taekwondo Kicks at the Initial Stage -- Part 6
Countering Taekwondo Kicks at the Initial Stage -- Part 7
Countering Taekwondo Kicks at the Initial Stage -- Part 8
Countering Taekwondo Kicks at the Initial Stage -- Part 9
Countering Taekwondo Kicks at the Initial Stage -- Part 10
Countering Taekwondo Kicks at the Initial Stage -- Part 11
Countering Taekwondo Kicks at the Initial Stage -- Part 12
The Mechanics of Planting Willow -- Part 1
The Mechanics of Planting Willow -- Part 2
The Mechanics of Planting Willow -- Part 3
The Mechanics of Planting Willow -- Part 4
The Mechanics of Planting Willow -- Part 5
The Mechanics of Planting Willow -- Part 6
The Mechanics of Planting Willow -- Part 7
The Mechanics of Planting Willow -- Part 8
The Mechanics of Planting Willow -- Part 9
The Mechanics of Planting Willow -- Part 10
The Mechanics of Planting Willow -- Part 11
 The Mechanics of Planting Willow -- Part 12
Planting Willow and Catching Crab -- Part 1
Planting Willow and Catching Crab -- Part 2
Planting Willow and Catching Crab -- Part 3
Planting Willow and Catching Crab -- Part 4
Planting Willow and Catching Crab -- Part 5
Planting Willow and Catching Crab -- Part 6
Planting Willow and Catching Crab -- Part 7
Planting Willow and Catching Crab -- Part 8
Planting Willow and Catching Crab -- Part 9
From Countering at Various Points to Initiating an Attack -- Part 1
From Countering at Various Points to Initiating an Attack -- Part 2
From Countering at Various Points to Initiating an Attack -- Part 3
From Countering at Various Points to Initiating an Attack -- Part 4
From Countering at Various Points to Initiating an Attack -- Part 5
From Countering at Various Points to Initiating an Attack -- Part 6
From Countering at Various Points to Initiating an Attack -- Part 7
From Countering at Various Points to Initiating an Attack -- Part 8
Free Sparring is Injury-Free and Full of Fun -- Part 1
Free Sparring is Injury-Free and Full of Fun -- Part 2
Free Sparring is Injury-Free and Full of Fun -- Part 3
Free Sparring is Injury-Free and Full of Fun -- Part 4
Free Sparring is Injury-Free and Full of Fun -- Part 5
Free Sparring is Injury-Free and Full of Fun -- Part 6
Free Sparring is Injury-Free and Full of Fun -- Part 7
Free Sparring is Injury-Free and Full of Fun -- Part 8
Free Sparring is Injury-Free and Full of Fun -- Part 9
Free Sparring is Injury-Free and Full of Fun -- Part 10
Free Sparring is Injury-Free and Full of Fun -- Part 11
Free Sparring is Injury-Free and Full of Fun -- Part 12
 Free Sparring is Injury-Free and Full of Fun -- Part 13
Free Sparring is Injury-Free and Full of Fun -- Part 14
There is Ground Fighting in Shaolin Kungfu -- Overview
Take Down and Pin Down in Shaolin Kungfu -- Overview
Overturning Pin-Downs even when Opponents are
Bigger-Sized -- Overview
Countering while being Taken Down -- Overview
Countering the Shoot at the Initial State -- Overview
Countering Taekwondo Kicks at Finishing Stage -- Overview
Countering Taekwondo Kicks at Intermediate Stage
-- Overview
It's Easy to Counter Kicks, If you Know How -- Overview
Countering Taekwondo Kicks at the Initial Stage -- Overview
The Mechanics of Planting Willow -- Overview
Planting Willow and Catching Crab -- Overview
From Countering at Various Points to Initiating an Attack -- Overview
Free Sparring is Injury-Free and Full of Fun -- Overview