VIDEO-CLIPS-5p
Special Wing Choon Course (Cont)
 Wing Choon Kungfu -- Wing Choon 04
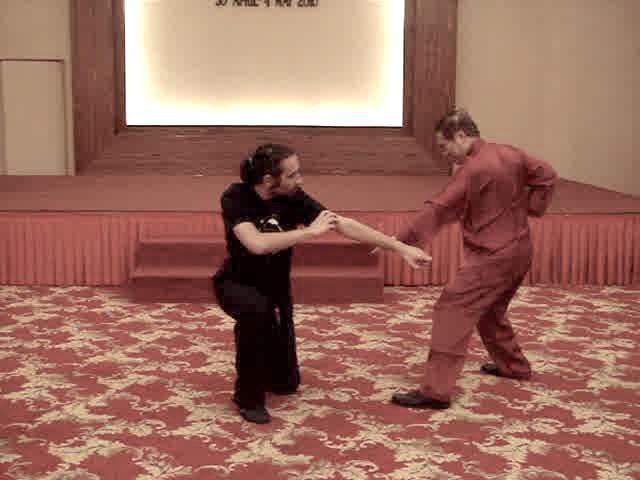
Taming and Locking an Opponent and
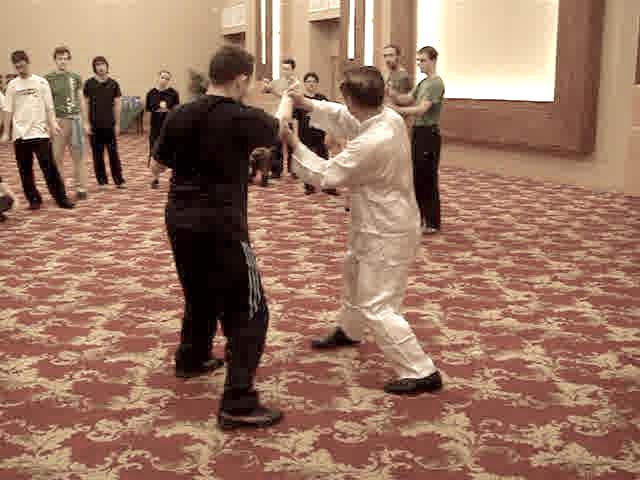
Wing Choon Kungfu -- Wing Choon 04
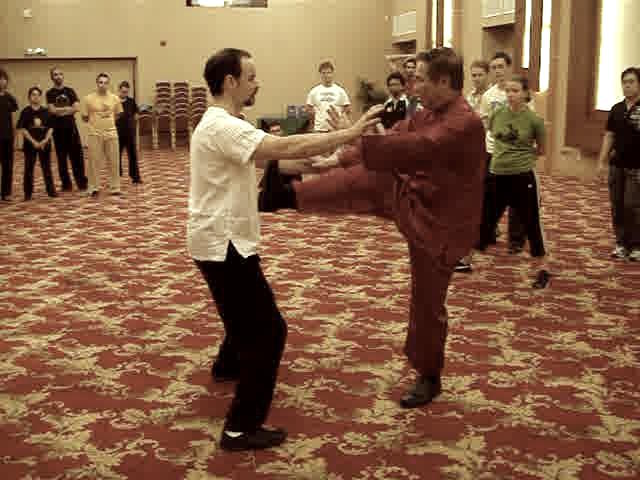
Taming and Locking an Opponent andSimultaneously Striking Him -- Part 1
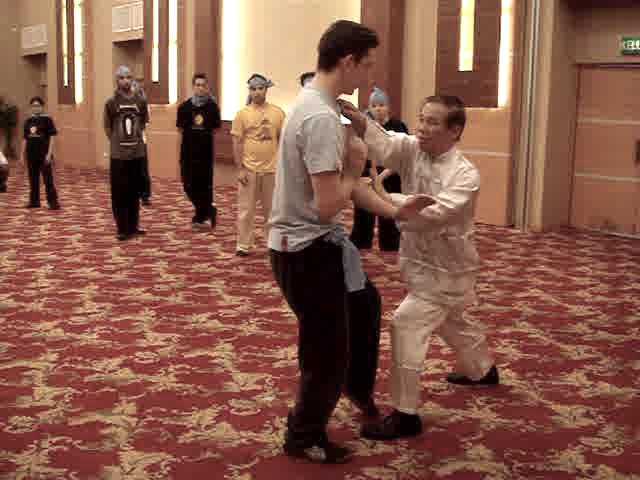
Taming and Locking an Opponent and
Simultaneously Striking Him -- Part 2
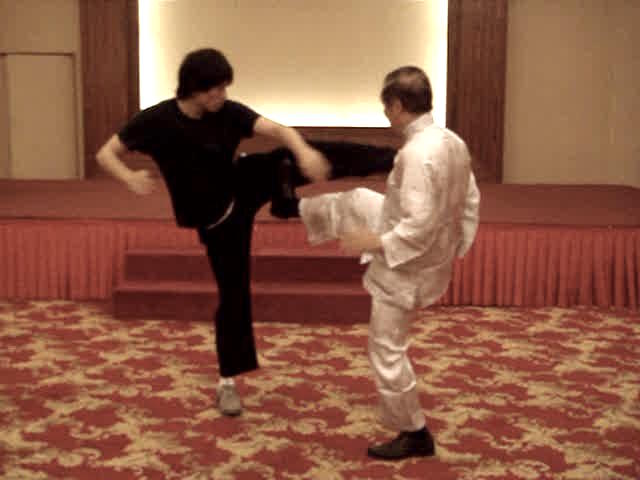
Taming and Locking an Opponent and
Simultaneously Striking Him -- Part 3
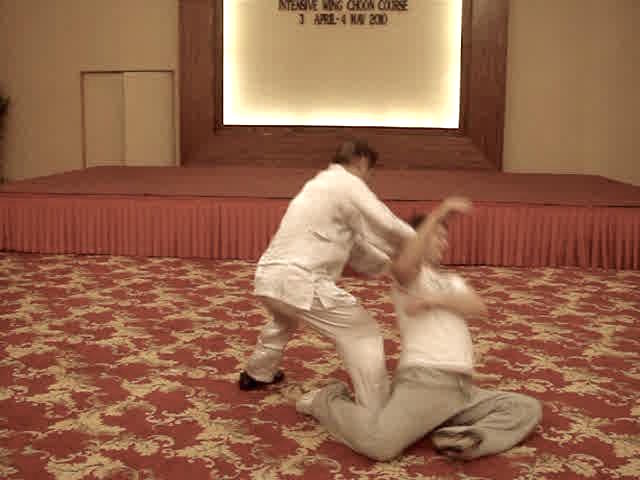
Taming and Locking an Opponent and
Simultaneously Striking Him -- Part 4
Taming and Locking an Opponent and
Simultaneously Striking Him -- Part 5
Taming and Locking an Opponent and Simultaneously Striking Him -- Part 7
Taming and Locking an Opponent and Simultaneously Striking Him -- Part 8
Excellent Counters Proposed by Course Participants -- Part 1
Excellent Counters Proposed by Course Participants -- Part 2
Excellent Counters Proposed by Course Participants -- Part 3
Excellent Counters Proposed by Course Participants -- Part 4
Excellent Counters Proposed by Course Participants -- Part 5
Excellent Counters Proposed by Course Participants -- Part 6
Excellent Counters Proposed by Course Participants -- Part 7
Excellent Counters Proposed by Course Participants -- Part 8
Exploiting Opponent's Weaknesses in Combat -- Part 1
Exploiting Opponent's Weaknesses in Combat -- Part 2
Exploiting Opponent's Weaknesses in Combat -- Part 3
Exploiting Opponent's Weaknesses in Combat -- Part 4
Exploiting Opponent's Weaknesses in Combat -- Part 5
Exploiting Opponent's Weaknesses in Combat -- Part 6
Exploiting Opponent's Weaknesses in Combat -- Part 7
Exploiting Opponent's Weaknesses in Combat -- Part 8
Exploiting Opponent's Weaknesses in Combat -- Part 9
When you are being Locked and Pressed against a Wall -- Part 1
When you are being Locked and Pressed against a Wall -- Part 2
When you are being Locked and Pressed against a Wall -- Part 3
When you are being Locked and Pressed against a Wall -- Part 4
When you are being Locked and Pressed against a Wall -- Part 5
When you are being Locked and Pressed against a Wall -- Part 6
 Learning the Forms of Phew Chee -- Part 1
Learning the Forms of Phew Chee -- Part 2
Learning the Forms of Phew Chee -- Part 3
Learning the Forms of Phew Chee -- Part 4
Learning the Forms of Phew Chee -- Part 5
Learning the Forms of Phew Chee -- Part 6
Learning the Forms of Phew Chee -- Part 7
Learning the Forms of Phew Chee -- Part 8
Learning the Forms of Phew Chee -- Part 9
Learning the Forms of Phew Chee -- Part 10
Learning the Forms of Phew Chee -- Part 11
Learning the Forms of Phew Chee -- Part 12
From Pattern Practice to Free Sparring -- Part 1
From Pattern Practice to Free Sparring -- Part 2
From Pattern Practice to Free Sparring -- Part 3
From Pattern Practice to Free Sparring -- Part 4
When you are being Locked a dPrressed against a Wall -- Part 7
When you are being Locked a dPrressed against a Wall -- Part 8
Moving from In-Gate to Out-Gate and Vice Versa -- Part 1
Moving from In-Gate to Out-Gate and Vice Versa -- Part 2
Moving from In-Gate to Out-Gate and Vice Versa -- Part 3
Moving from In-Gate to Out-Gate and Vice Versa -- Part 4
Moving from In-Gate to Out-Gate and Vice Versa -- Part 5
Moving from In-Gate to Out-Gate and Vice Versa -- Part 6
Moving from In-Gate to Out-Gate and Vice Versa -- Part 7
Moving from In-Gate to Out-Gate and Vice Versa -- Part 8
Moving from In-Gate to Out-Gate and Vice Versa -- Part 9
Effective Counters against Grips and Locks -- Part 1
Effective Counters against Grips and Locks -- Part 2
Effective Counters against Grips and Locks -- Part 3
 Effective Counters against Grips and Locks -- Part 4
Effective Counters against Grips and Locks -- Part 5
Effective Counters against Grips and Locks -- Part 6
Effective Counters against Grips and Locks -- Part 7
Effective Counters against Grips and Locks -- Part 8
Effective Counters against Grips and Locks -- Part 9
Effective Counters against Grips and Locks -- Part 10
No Defence Direct Counter against Formidable
Bottom Attacks -- Part 1
No Defence Direct Counter against Formidable
Bottom Attacks -- Part 2
No Defence Direct Counter against Formidable Bottom Attacks -- Part 3
No Defence Direct Counter against Formidable Bottom Attacks -- Part 4
No Defence Direct Counter against Formidable Bottom Attacks -- Part 5
No Defence Direct Counter against Formidable Bottom Attacks -- Part 6
No Defence Direct Counter against Formidable Bottom Attacks -- Part 7
No Defence Direct Counter against Formidable Bottom Attacks -- Part 8
No Defence Direct Counter against Formidable Bottom Attacks -- Part 9
No Defence Direct Counter against Formidable Bottom Attacks -- Part 10
No Defence Direct Counter against Formidable Bottom Attacks -- Part 11
Horizontal Chops and Crane Beaks in Side Attacks -- Part 1
Horizontal Chops and Crane Beaks in Side Attacks -- Part 2
Horizontal Chops and Crane Beaks in Side Attacks -- Part 3
Horizontal Chops and Crane Beaks in Side Attacks -- Part 4
Horizontal Chops and Crane Beaks in Side Attacks -- Part 5
Horizontal Chops and Crane Beaks in Side Attacks -- Part 6
Horizontal Chops and Crane Beaks in Side Attacks -- Part 7
Horizontal Chops and Crane Beaks in Side Attacks -- Part 8
Horizontal Chops and Crane Beaks in Side Attacks -- Part 9
Horizontal Chops and Crane Beaks in Side Attacks -- Part 10
Horizontal Chops and Crane Beaks in Side Attacks -- Part 11
Top and Middle Attacks and their Counters -- Part 1
 Top and Middle Attacks and their Counters -- Part 2
Top and Middle Attacks and their Counters -- Part 3
Top and Middle Attacks and their Counters -- Part 4
Top and Middle Attacks and their Counters -- Part 5
Top and Middle Attacks and their Counters -- Part 6
Top and Middle Attacks and their Counters -- Part 7
Top and Middle Attacks and their Counters -- Part 8
Top and Middle Attacks and their Counters -- Part 9
Top and Middle Attacks and their Counters -- Part 10
Top and Middle Attacks and their Counters -- Part 11
Top and Middle Attacks and their Counters -- Part 12
Botton and Side Attacks and their Counters -- Part 1
Botton and Side Attacks and their Counters -- Part 2
Botton and Side Attacks and their Counters -- Part 3
Botton and Side Attacks and their Counters -- Part 4
Botton and Side Attacks and their Counters -- Part 5
Botton and Side Attacks and their Counters -- Part 6
Botton and Side Attacks and their Counters -- Part 7
Botton and Side Attacks and their Counters -- Part 8
Botton and Side Attacks and their Counters -- Part 9
From Pattern Practice to Free Sparring -- Part 5
From Pattern Practice to Free Sparring -- Part 6
From Pattern Practice to Free Sparring -- Part 7
From Pattern Practice to Free Sparring -- Part 8
From Pattern Practice to Free Sparring -- Part 9
Taming and Locking an Opponent and Simultaneously Striking Him -- Overview
Excellent Counters Proposed by Course Participants -- Overview
Exploiting Opponent's Weaknesses in Combat -- Overview
When you are being Locked and Pressed against a Wall -- Overview
Moving from In-Gate to Out-Gate and Vice Versa -- Overview
 Effective Counters against Grips and Locks -- Overview
No Defence Direct Counter against Formidable Bottom Attacks -- Overview
Horizontal Chops and Crane Beaks in Side Attacks -- Overview
Top and Middle Attacks and their Counters -- Overview
Botton and Side Attacks and their Counters -- Overview
Learning the Forms of Phew Chee -- Overview
From Pattern Practice to Free Sparring -- Overview
Wing Choon Kungfu -- Wing Choon 05 Thrust Kicks and their Counters -- Part 1
Thrust Kicks and their Counters -- Part 2
Thrust Kicks and their Counters -- Part 3
Thrust Kicks and their Counters -- Part 4
Thrust Kicks and their Counters -- Part 5
Thrust Kicks and their Counters -- Part 6
Thrust Kicks and their Counters -- Part 7
Thrust Kicks and their Counters -- Part 8
Thrust Kicks and their Counters -- Part 9
Smart Practice Makes Perfect -- Part 1
Smart Practice Makes Perfect -- Part 2
Smart Practice Makes Perfect -- Part 3
Smart Practice Makes Perfect -- Part 4
Smart Practice Makes Perfect -- Part 5
Smart Practice Makes Perfect -- Part 6
Smart Practice Makes Perfect -- Part 7
Smart Practice Makes Perfect -- Part 8
Understanding Wing Choon Principles and Practice -- Part 1
Understanding Wing Choon Principles and Practice -- Part 2
Understanding Wing Choon Principles and Practice -- Part 3
Understanding Wing Choon Principles and Practice -- Part 4Understanding Wing Choon Principles and Practice -- Part 5
Understanding Wing Choon Principles and Practice -- Part 6
Understanding Wing Choon Principles and Practice -- Part 7
Understanding Wing Choon Principles and Practice -- Part 8
Understanding Wing Choon Principles and Practice -- Part 9
Practicing Chi Sau while being Blind-Folded -- Part 1
Practicing Chi Sau while being Blind-Folded -- Part 2
Practicing Chi Sau while being Blind-Folded -- Part 3
Practicing Chi Sau while being Blind-Folded -- Part 4
Practicing Chi Sau while being Blind-Folded -- Part 5
Practicing Chi Sau while being Blind-Folded -- Part 6
Practicing Chi Sau while being Blind-Folded -- Part 7
Practicing Chi Sau while being Blind-Folded -- Part 8
Practicing Chi Sau while being Blind-Folded -- Part 9
Practicing Chi Sau while being Blind-Folded -- Part 10
Practicing Chi Sau while being Blind-Folded -- Part 11
Thrust Kicks and their Counters -- Overview
Smart Practice Makes Perfect -- Overview
Understanding Wing Choon Principles and Practice -- Overview
Practicing Chi Sau while being Blind-Folded -- Overview
Wing Choon Kungfu -- Wing Choon 06 Effective Counters against Kicks -- Part 1
Effective Counters against Kicks -- Part 2
Effective Counters against Kicks -- Part 3
Effective Counters against Kicks -- Part 4
Effective Counters against Kicks -- Part 5
Effective Counters against Kicks -- Part 6
Effective Counters against Kicks -- Part 7
Effective Counters against Kicks -- Part 8
Effective Counters against Kicks -- Part 9
Effective Counters against Kicks -- Part 10
 Effective Counters against Kicks -- Part 11
Cockerel Kicks against Whirlwind Kicks -- Part 1
Cockerel Kicks against Whirlwind Kicks -- Part 2
Cockerel Kicks against Whirlwind Kicks -- Part 3
Cockerel Kicks against Whirlwind Kicks -- Part 4
Cockerel Kicks against Whirlwind Kicks -- Part 5
Cockerel Kicks against Whirlwind Kicks -- Part 6
Cockerel Kicks against Whirlwind Kicks -- Part 7
Cockerel Kicks against Whirlwind Kicks -- Part 8
Cockerel Kicks against Whirlwind Kicks -- Part 9
Cockerel Kicks against Whirlwind Kicks -- Part 10
Cockerel Kicks against Whirlwind Kicks -- Part 11
Cockerel Kicks against Whirlwind Kicks -- Part 12
Cockerel Kicks against Whirlwind Kicks -- Part 13
Counters against Low Sweeping Kicks -- Part 1
Counters against Low Sweeping Kicks -- Part 2
Counters against Low Sweeping Kicks -- Part 3
Counters against Low Sweeping Kicks -- Part 4
Counters against Low Sweeping Kicks -- Part 5
Counters against Low Sweeping Kicks -- Part 6
Counters against Low Sweeping Kicks -- Part 7
Counters against Low Sweeping Kicks -- Part 8
Striking or Intercepting Opponent's Kicks -- Part 1
Striking or Intercepting Opponent's Kicks -- Part 2
Striking or Intercepting Opponent's Kicks -- Part 3
Striking or Intercepting Opponent's Kicks -- Part 4
Striking or Intercepting Opponent's Kicks -- Part 5
Striking or Intercepting Opponent's Kicks -- Part 6
Striking or Intercepting Opponent's Kicks -- Part 7
Striking or Intercepting Opponent's Kicks -- Part 8
 Striking or Intercepting Opponent's Kicks -- Part 9
Striking or Intercepting Opponent's Kicks -- Part 10
Striking or Intercepting Opponent's Kicks -- Part 11
Striking or Intercepting Opponent's Kicks -- Part 12
Helping One Another and Having Fun -- Part 1
Helping One Another and Having Fun -- Part 2
Sap Ye Thiak or Twelve Kicks -- Part 1
Helping One Another and Having Fun -- Part 3
Sap Ye Thiak or Twelve Kicks -- Part 2
Helping One Another and Having Fun -- Part 4
Sap Ye Thiak or Twelve Kicks -- Part 3
Helping One Another and Having Fun -- Part 5
Sap Ye Thiak or Twelve Kicks -- Part 4
Helping One Another and Having Fun -- Part 6
Sap Ye Thiak or Twelve Kicks -- Part 5
Helping One Another and Having Fun -- Part 7
Sap Ye Thiak or Twelve Kicks -- Part 6
Helping One Another and Having Fun -- Part 8
Helping One Another and Having Fun -- Part 9
Helping One Another and Having Fun -- Part 10
Helping One Another and Having Fun -- Part 11
Helping One Another and Having Fun -- Part 12
How do You Escape this Difficult Situation? -- Part 1
How do You Escape this Difficult Situation? -- Part 2
How do You Escape this Difficult Situation? -- Part 3
How do You Escape this Difficult Situation? -- Part 4
How do You Escape this Difficult Situation? -- Part 5
How do You Escape this Difficult Situation? -- Part 6
How do You Escape this Difficult Situation? -- Part 7
How do You Escape this Difficult Situation? -- Part 8
 How do You Escape this Difficult Situation? -- Part 9
How do You Escape this Difficult Situation? -- Part 10
Felling a Giant Almost Effortlessly -- Part 1
Felling a Giant Almost Effortlessly -- Part 2
Felling a Giant Almost Effortlessly -- Part 3
Felling a Giant Almost Effortlessly -- Part 4
Felling a Giant Almost Effortlessly -- Part 5
Felling a Giant Almost Effortlessly -- Part 6
Felling a Giant Almost Effortlessly -- Part 7
Felling a Giant Almost Effortlessly -- Part 8
Felling a Giant Almost Effortlessly -- Part 9
Felling a Giant Almost Effortlessly -- Part 10
Felling a Giant Almost Effortlessly -- Part 11
Effective Counters against Kicks -- Overview
Cockerel Kicks against Whirlwind Kicks -- Overview
Counters against Low Sweeping Kicks -- Overview
Striking or Intercepting Opponent's Kicks -- Overview
Helping One Another and Having Fun -- Overview
Sap Ye Thiak or Twelve Kicks -- Overview
How do You Escape this Difficult Situation? -- Overview
Felling a Giant Almost Effortlessly -- Overview
Wing Choon Kungfu -- Wing Choon 07 Turning a Weakness into a Strength -- Part 1
Turning a Weakness into a Strength -- Part 2
Turning a Weakness into a Strength -- Part 3
Turning a Weakness into a Strength -- Part 4
Turning a Weakness into a Strength -- Part 5
Turning a Weakness into a Strength -- Part 6
Turning a Weakness into a Strength -- Part 7
Turning a Weakness into a Strength -- Part 8
Turning a Weakness into a Strength -- Part 9
Turning a Weakness into a Strength -- Part 10
 Turning a Weakness into a Strength -- Part 11
Butterfly Palms against Double Grip Chin-Na Attack -- Part 1
Butterfly Palms against Double Grip Chin-Na Attack -- Part 2
Butterfly Palms against Double Grip Chin-Na Attack -- Part 3
Butterfly Palms against Double Grip Chin-Na Attack -- Part 4
Butterfly Palms against Double Grip Chin-Na Attack -- Part 5
Butterfly Palms against Double Grip Chin-Na Attack -- Part 6
Butterfly Palms against Double Grip Chin-Na Attack -- Part 7
Butterfly Palms against Double Grip Chin-Na Attack -- Part 8
Butterfly Palms against Double Grip Chin-Na Attack -- Part 9
Butterfly Palms against Double Grip Chin-Na Attack -- Part 10
Do You Know the Combat Applications of these Apparently Useless Patterns? -- Part 1
Do You Know the Combat Applications of these Apparently Useless Patterns? -- Part 2
Do You Know the Combat Applications of these Apparently Useless Patterns? -- Part 3
Do You Know the Combat Applications of these Apparently Useless Patterns? -- Part 4
Do You Know the Combat Applications of these Apparently Useless Patterns? -- Part 5
Do You Know the Combat Applications of these Apparently Useless Patterns? -- Part 6
Do You Know the Combat Applications of these Apparently Useless Patterns? -- Part 7
Do You Know the Combat Applications of these Apparently Useless Patterns? -- Part 8
Do You Know the Combat Applications of these Apparently Useless Patterns? -- Part 9
Do You Know the Combat Applications of these Apparently Useless Patterns? -- Part 10
Sophisticated Applications of Seemingly Harmless Patterns -- Part 1
Sophisticated Applications of Seemingly Harmless Patterns -- Part 2
Sophisticated Applications of Seemingly Harmless Patterns -- Part 3
Sophisticated Applications of Seemingly Harmless Patterns -- Part 4
Sophisticated Applications of Seemingly Harmless Patterns -- Part 5
Sophisticated Applications of Seemingly Harmless Patterns -- Part 6
Sophisticated Applications of Seemingly Harmless Patterns -- Part 7
Sophisticated Applications of Seemingly Harmless Patterns -- Part 8
Sophisticated Applications of Seemingly Harmless Patterns -- Part 9
 Sophisticated Applications of Seemingly Harmless
Patterns -- Part 10
Have Fun Deciphering Sophisticated Applications
from Innocent-Looking Patterns -- Part 1
Have Fun Deciphering Sophisticated Applications
from Innocent-Looking Patterns -- Part 2
Have Fun Deciphering Sophisticated Applications
from Innocent-Looking Patterns -- Part 3
Have Fun Deciphering Sophisticated Applications
from Innocent-Looking Patterns -- Part 4
Have Fun Deciphering Sophisticated Applications
from Innocent-Looking Patterns -- Part 5
Have Fun Deciphering Sophisticated Applications from Innocent-Looking Patterns -- Part 6
Have Fun Deciphering Sophisticated Applications from Innocent-Looking Patterns -- Part 7
Have Fun Deciphering Sophisticated Applications from Innocent-Looking Patterns -- Part 8
Have Fun Deciphering Sophisticated Applications from Innocent-Looking Patterns -- Part 9
Have Fun Deciphering Sophisticated Applications from Innocent-Looking
Patterns -- Part 10
Have Fun Deciphering Sophisticated Applications from Innocent-Looking
Patterns -- Part 11
Big and Small Movements in Wing Choon Hand Techniques -- Part 1
Big and Small Movements in Wing Choon Hand Techniques -- Part 2
Big and Small Movements in Wing Choon Hand Techniques -- Part 3
Big and Small Movements in Wing Choon Hand Techniques -- Part 4
Big and Small Movements in Wing Choon Hand Techniques -- Part 5
Big and Small Movements in Wing Choon Hand Techniques -- Part 6
Big and Small Movements in Wing Choon Hand Techniques -- Part 7
Big and Small Movements in Wing Choon Hand Techniques -- Part 8
Big and Small Movements in Wing Choon Hand Techniques -- Part 9
The Course is Full of Interesting Surprises -- Part 1
The Course is Full of Interesting Surprises -- Part 2
The Course is Full of Interesting Surprises -- Part 3
The Course is Full of Interesting Surprises -- Part 4
The Course is Full of Interesting Surprises -- Part 5
The Course is Full of Interesting Surprises -- Part 6
The Course is Full of Interesting Surprises -- Part 7
The Course is Full of Interesting Surprises -- Part 8
The Course is Full of Interesting Surprises -- Part 9
 Turning a Weakness into a Strength -- Overview
Butterfly Palms against Double Grip Chin-Na
Attack -- Overview
Do You Know the Combat Applications of these
Apparently Useless Patterns? -- Overview
Sophisticated Applications of Seemingly Harmless
Patterns -- Overview
Have Fun Deciphering Sophisticated Applications
from Innocent-Looking Patterns -- Overview
Big and Small Movements in Wing Choon Hand
Techniques -- Overview
The Course is Full of Interesting Surprises -- Overview