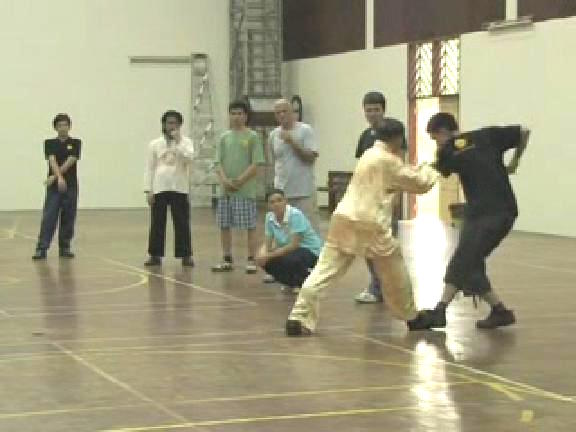
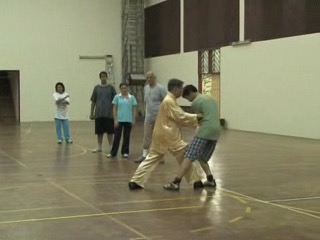
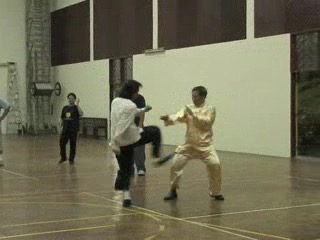
VIDEO-CLIPS-5f
Sabah Shaolin Kungfu 2009
Sabah Kungfu 2009 -- Sabah 01
Lessons from Intensive Shaolin KungfuCourse, 2009 -- Overview
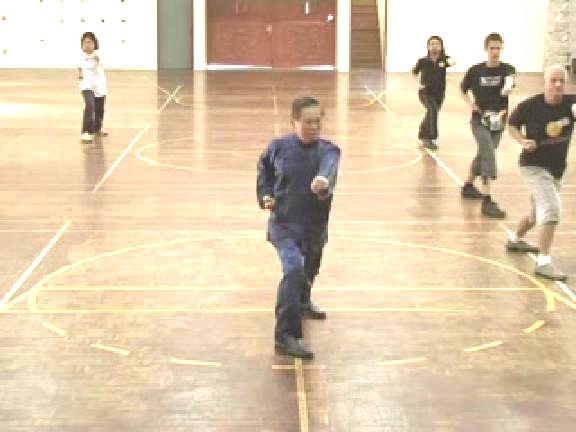
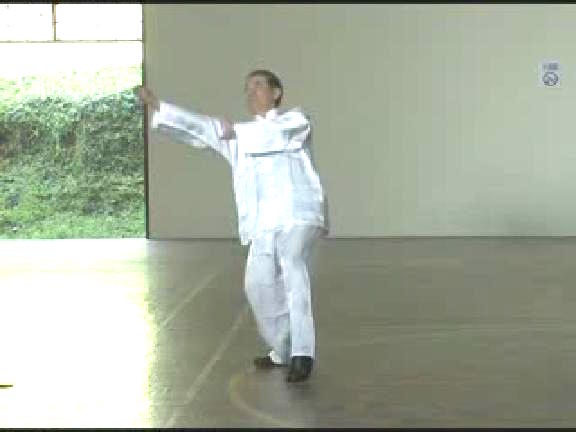
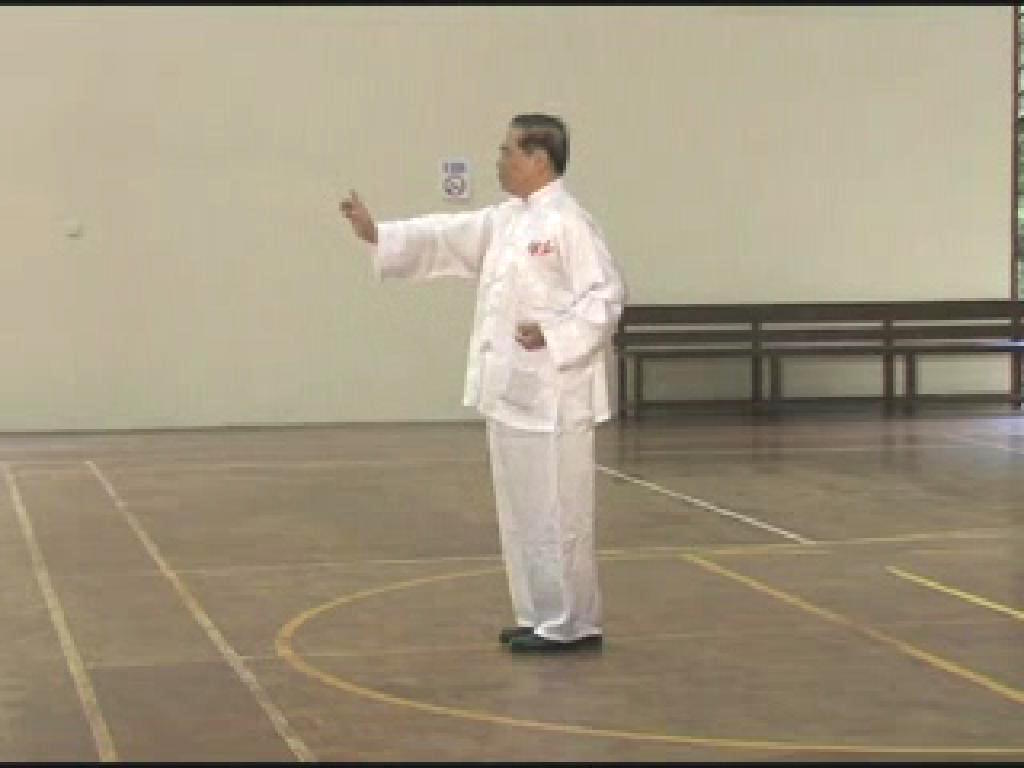
Horse-Riding Stance -- Part 1
Horse-Riding Stance -- Part 2
Horse-Riding Stance -- Part 3
Horse-Riding Stance -- Part 4
Horse-Riding Stance -- Part 5
Horse-Riding Stance -- Part 6
Horse-Riding Stance -- Part 7
Horse-Riding Stance -- Part 8
Horse-Riding Stance -- Part 9
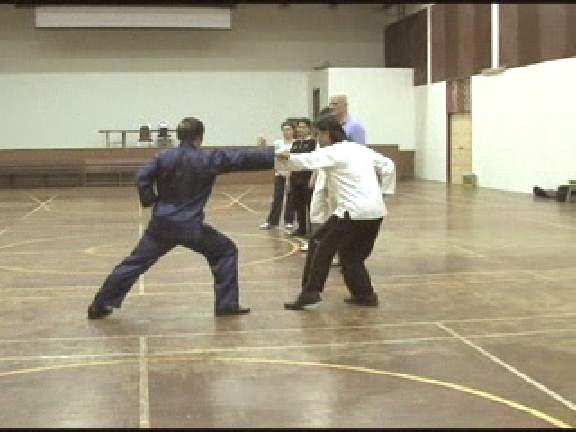
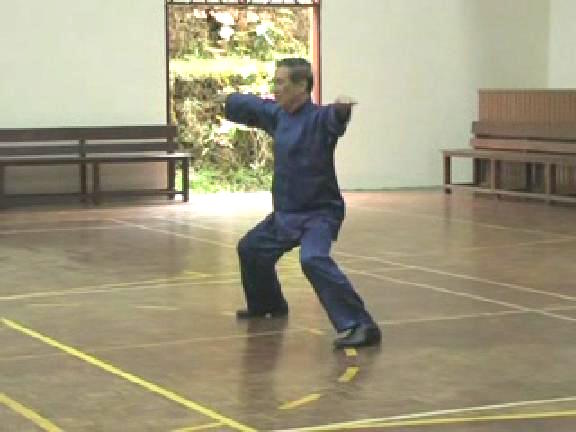
Bow-Arrow and False-Leg -- Part 1
Bow-Arrow and False-Leg -- Part 2
Bow-Arrow and False-Leg -- Part 3
Bow-Arrow and False-Leg -- Part 4
Bow-Arrow and False-Leg -- Part 5
Bow-Arrow and False-Leg -- Part 6
Bow-Arrow and False-Leg -- Part 7
Bow-Arrow and False-Leg -- Part 8
Bow-Arrow and False-Leg -- Part 9
Bow-Arrow and False-Leg -- Part 10
Unicorn, Goat, Four-Six and Single-Leg -- Part 1
Unicorn, Goat, Four-Six and Single-Leg -- Part 2
Unicorn, Goat, Four-Six and Single-Leg -- Part 3
Unicorn, Goat, Four-Six and Single-Leg -- Part 4
Unicorn, Goat, Four-Six and Single-Leg -- Part 5
Unicorn, Goat, Four-Six and Single-Leg -- Part 6
Unicorn, Goat, Four-Six and Single-Leg -- Part 7
Unicorn, Goat, Four-Six and Single-Leg -- Part 8
Unicorn, Goat, Four-Six and Single-Leg -- Part 9
Unicorn, Goat, Four-Six and Single-Leg -- Part 10
 Art of Flexibile Legs -- Part 1
Art of Flexibile Legs -- Part 2
Art of Flexibile Legs -- Part 3
Art of Flexibile Legs -- Part 4
Art of Flexibile Legs -- Part 5
Footwork -- Part 1
Footwork -- Part 2
Footwork -- Part 3
Footwork -- Part 4
Footwork -- Part 5
Footwork -- Part 6
Footwork -- Part 7
Footwork -- Part 8
Footwork -- Part 9
Footwork -- Part 10
Foundation of Kungfu: Horse-Riding Stance -- Overview
Foundation of Kungfu: Bow-Arrow and False-Leg -- Overview
Foundation of Kungfu: Unicorn, Goat, Four-Six and Single-Leg -- Overview
Foundation of Kungfu: Art of Flexibile Legs -- Overview
Foundation of Kungfu: Footwork -- Overview
Sabah Kungfu 2009 -- Sabah 02 Mechanics of Fa-Jing or Exploding Force -- Part 1
Mechanics of Fa-Jing or Exploding Force -- Part 2
Mechanics of Fa-Jing or Exploding Force -- Part 3
Mechanics of Fa-Jing or Exploding Force -- Part 4
Mechanics of Fa-Jing or Exploding Force -- Part 5
Mechanics of Fa-Jing or Exploding Force -- Part
Mechanics of Fa-Jing or Exploding Force -- Part 7
6 Mechanics of Fa-Jing or Exploding Force -- Part 8
Mechanics of Fa-Jing or Exploding Force -- Part 9
The Eight Basic Hand Patterns -- Part 1
 The Eight Basic Hand Patterns -- Part 2
The Eight Basic Hand Patterns -- Part 3
The Eight Basic Hand Patterns -- Part 4
The Eight Basic Hand Patterns -- Part 5
The Eight Basic Hand Patterns -- Part 6
The Eight Basic Hand Patterns -- Part 7
The Eight Basic Hand Patterns -- Part 8
The Eight Basic Hand Patterns -- Part 9
The Eight Basic Hand Patterns -- Part 10
The Eight Basic Hand Patterns -- Part 11
The Eight Basic Hand Patterns -- Part 12
Linking Patterns and Right Spacing -- Part 1
Linking Patterns and Right Spacing -- Part 2
Linking Patterns and Right Spacing -- Part 3
Linking Patterns and Right Sopcing -- Part 5
Linking Patterns and Right Spacing -- Part 6
Linking Patterns and Right Spacing -- Part 7
Linking Patterns and Right Spacing -- Part 8
Linking Patterns and Right Spacing -- Part 9
Linking Patterns and Right Spacing -- Part 10
Linking Patterns and Right Spacing -- Part 11
Right Spacing and Right Timing -- Part 1
Right Spacing and Right Timing -- Part 2
Right Spacing and Right Timing -- Part 3
Right Spacing and Right Timing -- Part 4
Right Spacing and Right Timing -- Part 5
Right Spacing and Right Timing -- Part 6
Right Spacing and Right Timing -- Part 7
Right Spacing and Right Timing -- Part 8
 Right Spacing and Right Timing -- Part 9
Opening, Closing and Covering -- Part 1
Opening, Closing and Covering -- Part 2
Opening, Closing and Covering -- Part 3
Opening, Closing and Covering -- Part
Opening, Closing and Covering -- Part 5
Opening, Closing and Covering -- Part 6
4 Opening, Closing and Covering -- Part 7
Opening, Closing and Covering -- Part 8
Opening, Closing and Covering -- Part 9
Opening, Closing and Covering -- Part 10
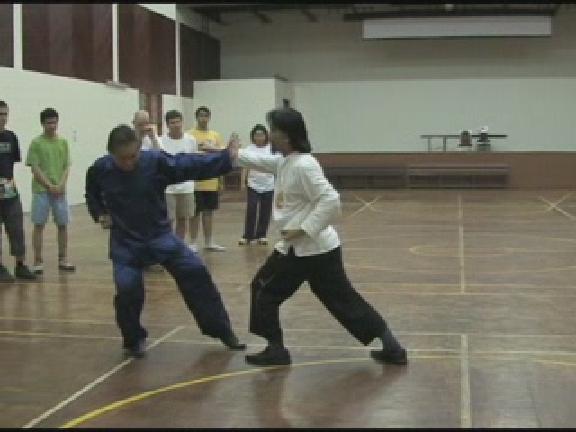
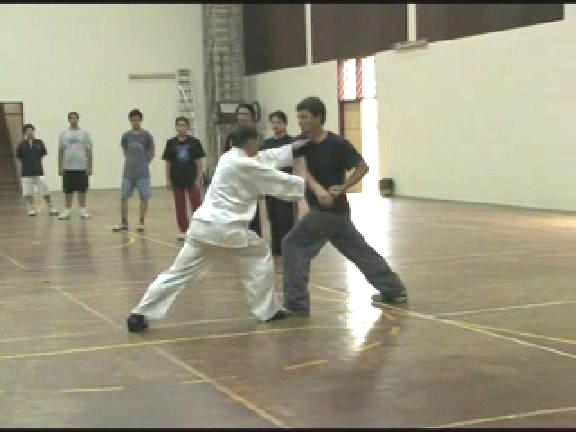
Some Techniques and Skills for Combat Efficiency -- Part 1
Some Techniques and Skills for Combat Efficiency -- Part 2
Some Techniques and Skills for Combat Efficiency -- Part 3
Some Techniques and Skills for Combat Efficiency -- Part 4
Some Techniques and Skills for Combat Efficiency -- Part 5
Some Techniques and Skills for Combat Efficiency -- Part 6
Some Techniques and Skills for Combat Efficiency -- Part 7
Some Techniques and Skills for Combat Efficiency -- Part 8
Some Techniques and Skills for Combat Efficiency -- Part 9
Some Techniques and Skills for Combat Efficiency -- Part 10
Some Techniques and Skills for Combat Efficiency -- Part 11
Some Techniques and Skills for Combat Efficiency -- Part 12
Some Techniques and Skills for Combat Efficiency -- Part 13
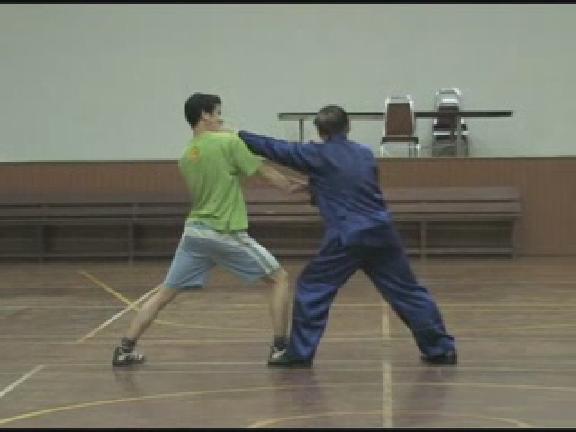
No Defence Direct Counter -- Part 1
No Defence Direct Counter -- Part 2
No Defence Direct Counter -- Part 3
No Defence Direct Counter -- Part 4
No Defence Direct Counter -- Part 5
No Defence Direct Counter -- Part 6
 No Defence Direct Counter -- Part 7
No Defence Direct Counter -- Part 8
Subtle Footwork and Feign Moves -- Part 1
Subtle Footwork and Feign Moves -- Part 2
Subtle Footwork and Feign Moves -- Part 3
Subtle Footwork and Feign Moves -- Part 4
Subtle Footwork and Feign Moves -- Part 5
Subtle Footwork and Feign Moves -- Part 6
Subtle Footwork and Feign Moves -- Part 7
Subtle Footwork and Feign Moves -- Part 8
Moving in to Initiate an Attack -- Part 1
Moving in to Initiate an Attack -- Part 2
Moving in to Initiate an Attack -- Part 3
Moving in to Initiate an Attack -- Part 4
Moving in to Initiate an Attack -- Part 5
Moving in to Initiate an Attack -- Part 6
Moving in to Initiate an Attack -- Part 7
Moving in to Initiate an Attack -- Part 8
Moving in to Initiate an Attack -- Part 9
Moving in to Initiate an Attack -- Part 10
Performing a Set with Force and Speed and without Panting -- Part 1
Performing a Set with Force and Speed and without Panting -- Part 2
Performing a Set with Force and Speed and without Panting -- Part 3
Performing a Set with Force and Speed and without Panting -- Part 4
Performing a Set with Force and Speed and without Panting -- Part 5
Performing a Set with Force and Speed and without Panting -- Part 6
Performing a Set with Force and Speed and without Panting -- Part 7
Performing a Set with Force and Speed and without Panting -- Part 8
The Mechanics of Fa-Jing or Exploding Force -- Overview
the Eight Basic Hand Patterns -- Overview
 Linking Patterns and Right Spacing -- Overview
Right Spacing and Right Timing -- Overview
Opening, Closing and Covering -- Overview
Some Techniques and Skills for Combat EfficiencyShaolin Kungfu -- Overview
No Defence Direct Counter -- Overview
Subtle Footwork and Feign Moves -- Overview
Moving in to Initiate an Attack -- Overview
Performing a Set with Force and Speed and without
Panting -- Overview
Sabah Kungfu 2009 -- Sabah 03 Combat Sequences 1 and 2, and Flower Hands -- Part 1
Combat Sequences 1 and 2, and Flower Hands -- Part 2
Combat Sequences 1 and 2, and Flower Hands -- Part 3
Combat Sequences 1 and 2, and Flower Hands -- Part 4
Combat Sequences 1 and 2, and Flower Hands -- Part 5
Combat Sequences 1 and 2, and Flower Hands -- Part 6
Combat Sequences 1 and 2, and Flower Hands -- Part 7
Combat Sequences 1 and 2, and Flower Hands -- Part 8
Combat Sequences 1 and 2, and Flower Hands -- Part 9
Combat Sequences 3 and 4, Free Offers and Bridging Gaps -- Part 1
Combat Sequences 3 and 4, Free Offers and Bridging Gaps -- Part 2
Combat Sequences 3 and 4, Free Offers and Bridging Gaps -- Part 3
Combat Sequences 3 and 4, Free Offers and Bridging Gaps -- Part 4
Combat Sequences 3 and 4, Free Offers and Bridging Gaps -- Part 5
Combat Sequences 3 and 4, Free Offers and Bridging Gaps -- Part 6
Combat Sequences 3 and 4, Free Offers and Bridging Gaps -- Part 7
Combat Sequences 3 and 4, Free Offers and Bridging Gaps -- Part 8
Combat Sequences 3 and 4, Free Offers and Bridging Gaps -- Part 9
Moving to Free Choice -- Part 1
Moving to Free Choice -- Part 2
 Moving to Free Choice -- Part 3
Moving to Free Choice -- Part 4
Moving to Free Choice -- Part 5
Moving to Free Choice -- Part 6
Moving to Free Choice -- Part 7
Continuing from First to Second Sequence -- Part 1
Continuing from First to Second Sequence -- Part 2
Continuing from First to Second Sequence -- Part 3
Continuing from First to Second Sequence -- Part 4
Continuing from First to Second Sequence -- Part 5
Continuing from First to Second Sequence -- Part 6
Continuing from First to Second Sequence -- Part 7
Continuing from First to Second Sequence -- Part 8
Continuing from First to Second Sequence -- Part 9
Combat Sequences 1 and 2 and Flower Hands -- Overview
Combat Sequences 3 and 4, Free Offers and Bridging Gaps -- Overview
Moving to Free Choice -- Overview
Continuing from First to Second Sequence -- Overview
Sabah Kungfu 2009 -- Sabah 04 The Invisible Strike -- Part 1
The Invisible Strike -- Part 2
The Invisible Strike -- Part 3
The Invisible Strike -- Part 4
The Invisible Strike -- Part 5
The Invisible Strike -- Part 6
The Invisible Strike -- Part 7
The Invisible Strike -- Part 8
Mastering Basic Skills -- Part 1
Mastering Basic Skills -- Part 2
 Mastering Basic Skills -- Part 3
Mastering Basic Skills -- Part 4
Mastering Basic Skills -- Part 5
Mastering Basic Skills -- Part 6
Mastering Basic Skills -- Part 7
Mastering Basic Skills -- Part 8
Mastering Basic Skills -- Part 9
Flowery Hands, False and Real, and Feign Moves -- Part 1
Flowery Hands, False and Real, and Feign Moves -- Part 2
Flowery Hands, False and Real, and Feign Moves -- Part 3
Flowery Hands, False and Real, and Feign Moves -- Part 4
Flowery Hands, False and Real, and Feign Moves -- Part 5
Flowery Hands, False and Real, and Feign Moves -- Part 6
Training of Jing, Qi and Shen -- Part 1
Training of Jing, Qi and Shen -- Part 2
Training of Jing, Qi and Shen -- Part 3
Training of Jing, Qi and Shen -- Part 4
Training of Jing, Qi and Shen -- Part 5
Training of Jing, Qi and Shen -- Part 6
Training of Jing, Qi and Shen -- Part 7
Applying Shaolin Kungfu on Boxing -- Part 1
Applying Shaolin Kungfu on Boxing -- Part 2
Applying Shaolin Kungfu on Boxing -- Part 3
Applying Shaolin Kungfu on Boxing -- Part 4
Applying Shaolin Kungfu on Boxing -- Part 5
Applying Shaolin Kungfu on Boxing -- Part 6
Exploiting the Technical Advantages Shaolin has over Boxing -- Part 1
Exploiting the Technical Advantages Shaolin has over Boxing -- Part 2
Exploiting the Technical Advantages Shaolin has over Boxing -- Part 3
Exploiting the Technical Advantages Shaolin has over Boxing -- Part 4
 Exploiting the Technical Advantages Shaolin has
over Boxing -- Part 5
Exploiting the Technical Advantages Shaolin has
over Boxing -- Part 6
Exploiting the Technical Advantages Shaolin has
over Boxing -- Part 7
Accomplished in One Breath -- Part 1
Accomplished in One Breath -- Part 2
Accomplished in One Breath -- Part 3
Accomplished in One Breath -- Part 4
Accomplished in One Breath -- Part 5
Accomplished in One Breath -- Part 6
Modifying Hand Forms and Stances t Derive Variations -- Part 1
Modifying Hand Forms and Stances t Derive Variations -- Part 2
Continuation and Exploding Force with Left Palm -- Part 1
Continuation and Exploding Force with Left Palm -- Part 2
Continuation and Exploding Force with Left Palm -- Part 3
Continuation and Exploding Force with Left Palm -- Part 4
Modifying Hand Forms and Stances t Derive Variations -- Part 3
Modifying Hand Forms and Stances t Derive Variations -- Part 4
Modifying Hand Forms and Stances t Derive Variations -- Part 5
Modifying Hand Forms and Stances t Derive Variations -- Part 6
Modifying Hand Forms and Stances t Derive Variations -- Part 7
Modifying Hand Forms and Stances t Derive Variations -- Part 8
Continuation and Exploding Force with Left Palm -- Part 5
Continuation and Exploding Force with Left Palm -- Part 6
Continuation and Exploding Force with Left Palm -- Part 7
Continuation and Exploding Force with Left Palm -- Part 8
Continuation and Exploding Force with Left Palm -- Part 9
Continuation and Exploding Force with Left Palm -- Part 10
Marvelous Techniques beget Marvelous Techniques -- Part 1
Marvelous Techniques beget Marvelous Techniques -- Part 2
Marvelous Techniques beget Marvelous Techniques -- Part 3
 Marvelous Techniques beget Marvelous Techniques -- Part 4
Marvelous Techniques beget Marvelous Techniques -- Part 5
Marvelous Techniques beget Marvelous Techniques -- Part 6
Marvelous Techniques beget Marvelous Techniques -- Part 7
Marvelous Techniques beget Marvelous Techniques -- Part 8
From Three Steps to One Step in Defence-cum-Counter
-- Part 1
From Three Steps to One Step in Defence-cum-Counter
-- Part 2
From Three Steps to One Step in Defence-cum-Counter
-- Part 3
From Three Steps to One Step in Defence-cum-Counter -- Part 4
From Three Steps to One Step in Defence-cum-Counter -- Part 5
From Three Steps to One Step in Defence-cum-Counter -- Part 6
From Three Steps to One Step in Defence-cum-Counter -- Part 7
From Three Steps to One Step in Defence-cum-Counter -- Part 8
From Three Steps to One Step in Defence-cum-Counter -- Part 9
Just Move a Step Back to Neutralize a Seemingly Helpless Situation -- Part 1
Just Move a Step Back to Neutralize a Seemingly Helpless Situation -- Part 2
Just Move a Step Back to Neutralize a Seemingly Helpless Situation -- Part 3
Just Move a Step Back to Neutralize a Seemingly Helpless Situation -- Part 4
Just Move a Step Back to Neutralize a Seemingly Helpless Situation -- Part 5
Just Move a Step Back to Neutralize a Seemingly Helpless Situation -- Part 6
Just Move a Step Back to Neutralize a Seemingly Helpless Situation -- Part 7
Just Move a Step Back to Neutralize a Seemingly Helpless Situation -- Part 8
Just Move a Step Back to Neutralize a Seemingly Helpless Situation -- Part 9
The Tactic of No Defence Direct Counter -- Part 1
The Tactic of No Defence Direct Counter -- Part 2
The Tactic of No Defence Direct Counter -- Part 3
The Tactic of No Defence Direct Counter -- Part 4
The Tactic of No Defence Direct Counter -- Part 5
The Tactic of No Defence Direct Counter -- Part 6
The Tactic of No Defence Direct Counter -- Part 7
 The Tactic of No Defence Direct Counter -- Part 8
The Tactic of No Defence Direct Counter -- Part 9
The Tactic of Flow or Leak -- Part 1
The Tactic of Flow or Leak -- Part 2
The Tactic of Flow or Leak -- Part 3
The Tactic of Flow or Leak -- Part 4
The Tactic of Flow or Leak -- Part 5
The Tactic of Flow or Leak -- Part 6
The Tactic of Flow or Leak -- Part 7
The Tactic of Flow or Leak -- Part 8
The Tactic of Presing Attacks -- Part 1
The Tactic of Presing Attacks -- Part 2
The Tactic of Presing Attacks -- Part 3
The Tactic of Presing Attacks -- Part 4
The Tactic of Presing Attacks -- Part 5
The Tactic of Presing Attacks -- Part 6
The Tactic of Presing Attacks -- Part 7
The Tactic of Presing Attacks -- Part 8
Pressing Attacks with Variations of Planned Sequence -- Part 1
Pressing Attacks with Variations of Planned Sequence -- Part 2
Pressing Attacks with Variations of Planned Sequence -- Part 3
Pressing Attacks with Variations of Planned Sequence -- Part 4
Pressing Attacks with Variations of Planned Sequence -- Part 5
Pressing Attacks with Variations of Planned Sequence -- Part 6
Pressing Attacks with Variations of Planned Sequence -- Part 7
Pressing Attacks with Variations of Planned Sequence -- Part 8
Pressing Attacks with Variations of Planned Sequence -- Part 9
Review of Combat Sequences 5 to 8 -- Part 1
Review of Combat Sequences 5 to 8 -- Part 2
Review of Combat Sequences 5 to 8 -- Part 3
 Review of Combat Sequences 5 to 8 -- Part 4
Review of Combat Sequences 5 to 8 -- Part 5
Review of Combat Sequences 5 to 8 -- Part 6
Review of Combat Sequences 5 to 8 -- Part 7
Review of Combat Sequences 5 to 8 -- Part 8
Review of Combat Sequences 5 to 8 -- Part 9
The Tactic and Skill of Follow Through -- Part 1
The Tactic and Skill of Follow Through -- Part 2
The Tactic and Skill of Follow Through -- Part 3
The Tactic and Skill of Follow Through -- Part 4
The Tactic and Skill of Follow Through -- Part 5
The Tactic and Skill of Follow Through -- Part 6
The Tactic and Skill of Follow Through -- Part 7
The Tactic and Skill of Follow Through -- Part 8
The Tactic and Skill of Follow Through -- Part 9
The Invisible Strike -- Overview
Mastering Basic Skills -- Overview
Flowery Hands, False and Real, and Feign Moves -- Overview
Training of Jing, Qi and Shen -- Overview
Applying Shaolin Kungfu on Boxing -- Overview
Exploiting the Technical Advantages Shaolin has over Boxing -- Overview
Accomplished in One Breath -- Overview
Modifying Hand Forms and Stances t Derive Variations -- Overview
Continuation and Exploding Force with Left Palm -- Overview
Marvelous Techniques beget Marvelous Techniques -- Overview
From Three Steps to One Step in Defence-cum-Counter -- Overview
Just Move a Step Back to Neutralize a Seemingly Helpless Situation -- Overview
The Tactic of No Defence Direct Counter -- Overview
The Tactic of Flow or Leak -- Overview
The Tactic of Presing Attacks -- Overview
 Pressing Attacks with Variations of Planned
Sequence -- Overview
Review of Combat Sequences 5 to 8 -- Overview
The Tactic and Skill of Follow Through -- Overview
Sabah Kungfu 2009 -- Sabah 05 Adding Hand-Forms to Stances in Force Training -- Part 1
Adding Hand-Forms to Stances in Force Training -- Part 2
Adding Hand-Forms to Stances in Force Training -- Part 3
Adding Hand-Forms to Stances in Force Training -- Part 4
Adding Hand-Forms to Stances in Force Training -- Part 5
Adding Hand-Forms to Stances in Force Training -- Part 6
Adding Hand-Forms to Stances in Force Training -- Part 7
Adding Hand-Forms to Stances in Force Training -- Part 8
Stance Training in Taijiquan, Shaolin, Hsing Yi and Baguazhang -- Part 1
Stance Training in Taijiquan, Shaolin, Hsing Yi and Baguazhang -- Part 2
Stance Training in Taijiquan, Shaolin, Hsing Yi and Baguazhang -- Part 3
Stance Training in Taijiquan, Shaolin, Hsing Yi and Baguazhang -- Part 4
Stance Training in Taijiquan, Shaolin, Hsing Yi and Baguazhang -- Part 5
Stance Training in Taijiquan, Shaolin, Hsing Yi and Baguazhang -- Part 6
From Slow and Graceful to Fast and Agile -- Part 1
From Slow and Graceful to Fast and Agile -- Part 2
From Slow and Graceful to Fast and Agile -- Part 3
From Slow and Graceful to Fast and Agile -- Part 4>
From Slow and Graceful to Fast and Agile -- Part 5
From Slow and Graceful to Fast and Agile -- Part 6
From Slow and Graceful to Fast and Agile -- Part 7
From Slow and Graceful to Fast and Agile -- Part 8
From Slow and Graceful to Fast and Agile -- Part 9
From Slow and Graceful to Fast and Agile -- Part 10
Kungfu Movements with Force, Speed and Elegance -- Part 1
Kungfu Movements with Force, Speed and Elegance -- Part 2
Kungfu Movements with Force, Speed and Elegance -- Part 3
Kungfu Movements with Force, Speed and Elegance -- Part 4
Kungfu Movements with Force, Speed and Elegance -- Part 5
Kungfu Movements with Force, Speed and Elegance -- Part 6
 Kungfu Movements with Force, Speed and Elegance -- Part 7
Kungfu Movements with Force, Speed and Elegance -- Part 8
Kungfu Movements with Force, Speed and Elegance -- Part 9
Kungfu Movements with Force, Speed and Elegance -- Part 10
One-Finger Shooting Zen at Standing Uprigt Position -- Part 1
One-Finger Shooting Zen at Standing Uprigt Position -- Part 2
One-Finger Shooting Zen at Standing Uprigt Position -- Part 3
One-Finger Shooting Zen at Standing Uprigt Position -- Part 4
One-Finger Shooting Zen at Standing Uprigt Position -- Part 5
One-Finger Shooting Zen at Standing Uprigt Position -- Part 6
One-Finger Shooting Zen at Standing Uprigt Position -- Part 7
One-Finger Shooting Zen at Standing Uprigt Position -- Part 8
One-Finger Shooting Zen at Standing Uprigt Position -- Part 9
One-Finger Shooting Zen at Standing Uprigt Position -- Part 10
A Treasure for Training Energy and Mind -- Part 1
A Treasure for Training Energy and Mind -- Part 2
A Treasure for Training Energy and Mind -- Part 3
A Treasure for Training Energy and Mind -- Part 4
A Treasure for Training Energy and Mind -- Part 5
A Treasure for Training Energy and Mind -- Part 6
Adding Hand-Forms to Stances in Force Training -- Overview
Stance Training in Taijiquan, Shaolin, Hsing Yi and Baguazhang -- Overview
From Slow and Graceful to Fast and Agile -- Overview
Kungfu Movements with Force, Speed and Elegance -- Overview
One-Finger Shooting Zen at Standing Uprigt Position -- Overview
A Treasure for Training Energy and Mind -- Overview
 Sabah Kungfu 2009 -- Sabah 06
Combat Sequence 9: Happy Bird Hop up Branch -- Part 1
Sabah Kungfu 2009 -- Sabah 06
Combat Sequence 9: Happy Bird Hop up Branch -- Part 1Combat Sequence 9: Happy Bird Hop up Branch -- Part 2
Combat Sequence 9: Happy Bird Hop up Branch -- Part 3
Combat Sequence 9: Happy Bird Hop up Branch -- Part 4
Combat Sequence 9: Happy Bird Hop up Branch -- Part 5
Combat Sequence 9: Happy Bird Hop up Branch -- Part 6
Combat Sequence 9: Happy Bird Hop up Branch -- Part 7
Combat Sequence 9: Happy Bird Hop up Branch -- Part 8
Combat Sequence 9: Happy Bird Hop up Branch -- Part 9
Combat Sequence 9: Happy Bird Hop up Branch -- Part 10
Pressing Attacks and Interceptions -- Part 1
Pressing Attacks and Interceptions -- Part 2
Pressing Attacks and Interceptions -- Part 3
Pressing Attacks and Interceptions -- Part 4
Pressing Attacks and Interceptions -- Part 5
Pressing Attacks and Interceptions -- Part 6
Combat Sequence 10: White Horse Present Hoof -- Part 1
Combat Sequence 10: White Horse Present Hoof -- Part 2
Combat Sequence 10: White Horse Present Hoof -- Part 3
Combat Sequence 10: White Horse Present Hoof -- Part 4
Combat Sequence 10: White Horse Present Hoof -- Part 5
Combat Sequence 10: White Horse Present Hoof -- Part 6
Combat Sequence 10: White Horse Present Hoof -- Part 7
Combat Sequence 10: White Horse Present Hoof -- Part 8
Combat Sequence 10: White Horse Present Hoof -- Part 9
Techniques, Speed and Skills -- Part 1
Techniques, Speed and Skills -- Part 2
Techniques, Speed and Skills -- Part 3
Techniques, Speed and Skills -- Part 4
Techniques, Speed and Skills -- Part 5
 Techniques, Speed and Skills -- Part 6
Techniques, Speed and Skills -- Part 7
Techniques, Speed and Skills -- Part 8
Techniques, Speed and Skills -- Part 9
Combat Sequence 11: Yellow Oriole Drinks Water -- Part 1
Combat Sequence 11: Yellow Oriole Drinks Water -- Part 2
Combat Sequence 11: Yellow Oriole Drinks Water -- Part 3
Combat Sequence 11: Yellow Oriole Drinks Water -- Part 4
Combat Sequence 11: Yellow Oriole Drinks Water -- Part 5
Combat Sequence 11: Yellow Oriole Drinks Water -- Part 6
Some Effective Techniques and their Counters -- Part 7
Some Effective Techniques and their Counters -- Part 8
Some Effective Techniques and their Counters -- Part 9
Some Effective Techniques and their Counters -- Part 1
Some Effective Techniques and their Counters -- Part 2
Some Effective Techniques and their Counters -- Part 3
Some Effective Techniques and their Counters -- Part 4
Some Effective Techniques and their Counters -- Part 5
Some Effective Techniques and their Counters -- Part 6
Some Effective Techniques and their Counters -- Part 7
Some Effective Techniques and their Counters -- Part 8
Combat Sequence 12:Naughty Monkey Kicks at Tree -- Part 1
Combat Sequence 12:Naughty Monkey Kicks at Tree -- Part 2
Combat Sequence 12:Naughty Monkey Kicks at Tree -- Part 3
Combat Sequence 12:Naughty Monkey Kicks at Tree -- Part 4
Combat Sequence 12:Naughty Monkey Kicks at Tree -- Part 5
Combat Sequence 12:Naughty Monkey Kicks at Tree -- Part 6
Combat Sequence 12:Naughty Monkey Kicks at Tree -- Part 7
Combat Sequence 12:Naughty Monkey Kicks at Tree -- Part 8
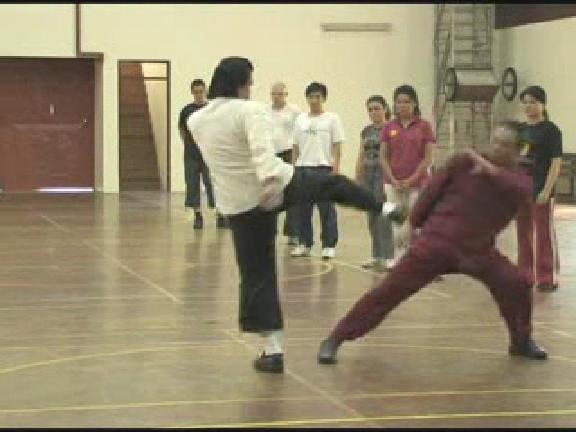
Hard and Soft Counters against Sweeping Kicks -- Part 1
 Hard and Soft Counters against Sweeping Kicks -- Part 2
Hard and Soft Counters against Sweeping Kicks -- Part 3
Hard and Soft Counters against Sweeping Kicks -- Part 4
Hard and Soft Counters against Sweeping Kicks -- Part 5
Hard and Soft Counters against Sweeping Kicks -- Part 6
Hard and Soft Counters against Sweeping Kicks -- Part 7
Hard and Soft Counters against Sweeping Kicks -- Part 8
Hard and Soft Counters against Sweeping Kicks -- Part 9
Linking Combat Sequences to Form Sets -- Part 1
Linking Combat Sequences to Form Sets -- Part 2
Linking Combat Sequences to Form Sets -- Part 3
Linking Combat Sequences to Form Sets -- Part 4
Linking Combat Sequences to Form Sets -- Part 5
Linking Combat Sequences to Form Sets -- Part 6
Linking Combat Sequences to Form Sets -- Part 7
Linking Combat Sequences to Form Sets -- Part 8
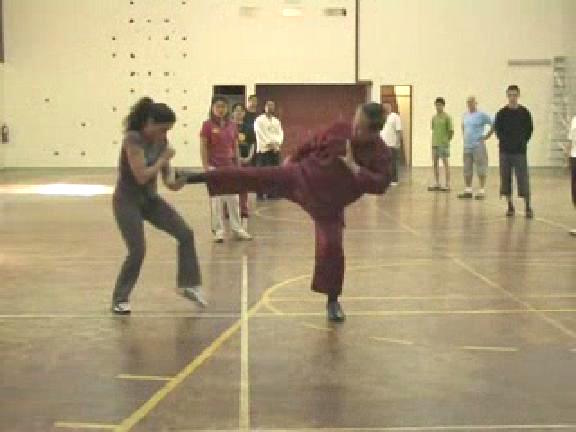
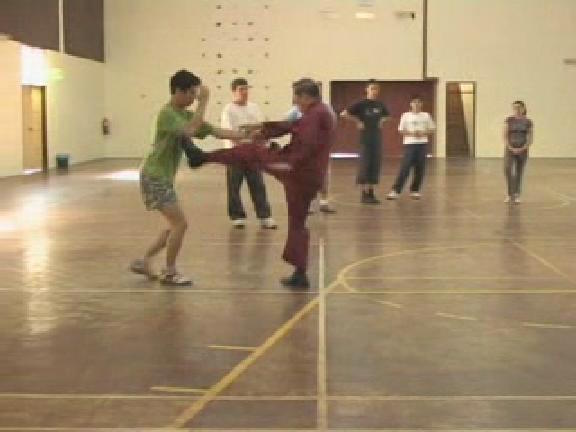
Five Basic Kicks of Shaolin Kungfu -- Part 1
Five Basic Kicks of Shaolin Kungfu -- Part 2
Five Basic Kicks of Shaolin Kungfu -- Part 3
Five Basic Kicks of Shaolin Kungfu -- Part 4
Five Basic Kicks of Shaolin Kungfu -- Part 5
Five Basic Kicks of Shaolin Kungfu -- Part 6
Five Basic Kicks of Shaolin Kungfu -- Part 7
Five Basic Kicks of Shaolin Kungfu -- Part 8
Five Basic Kicks of Shaolin Kungfu -- Overview
Combat Sequence 9: Happy Bird Hop up Branch -- Overview
Pressing Attacks and Interceptions -- Overview
Combat Sequence 10: White Horse Present Hoof -- Overview
Techniques, Speed and Skills -- Overview
Combat Sequence 11: Yellow Oriole Drinks Water -- Overview
 Some Effective Techniques and their Counters -- Overview
Combat Sequence 12:Naughty Monkey Kicks at
Tree -- Overview
Hard and Soft Counters against Sweeping Kicks -- Overview
Linking Combat Sequences to Form Sets -- Overview
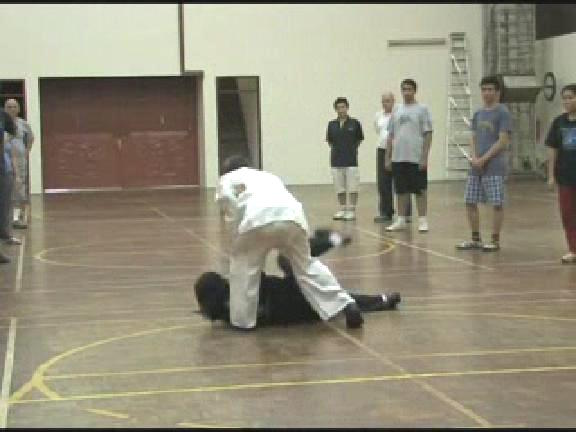
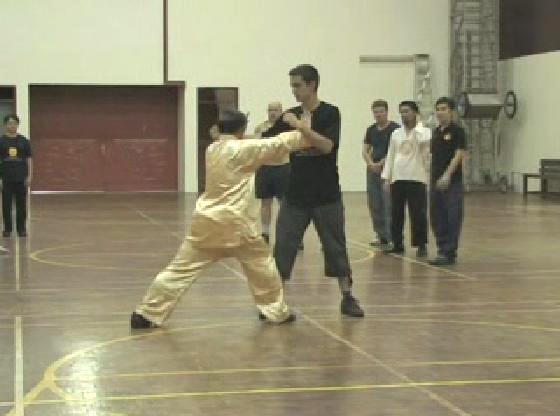
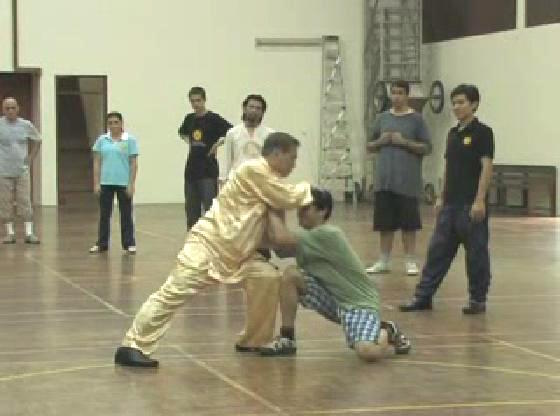
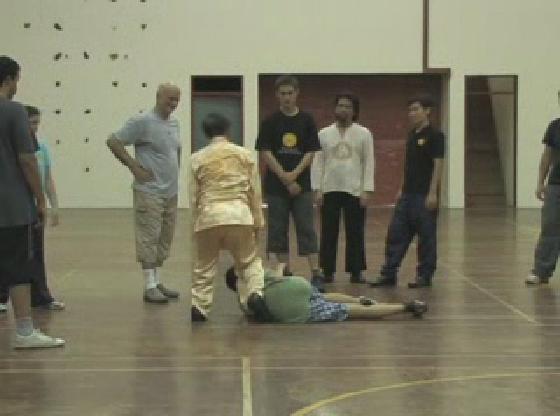
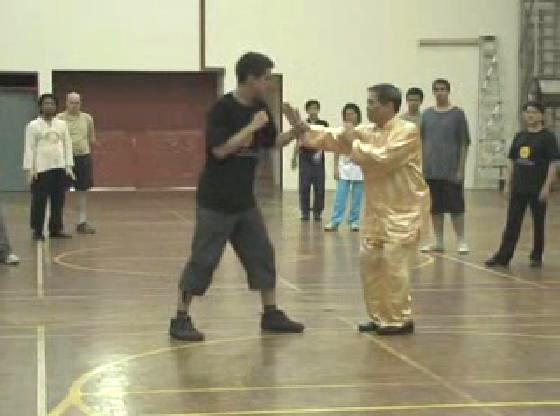
Sabah Kungfu 2009 -- Sabah 07 Shaolin Felling Techniques are unlike those of Judo and Wrestling -- Part 1
Shaolin Felling Techniques are unlike those of Judo and Wrestling -- Part 2
Shaolin Felling Techniques are unlike those of Judo and Wrestling -- Part 3
Shaolin Felling Techniques are unlike those of Judo and Wrestling -- Part 4
Shaolin Felling Techniques are unlike those of Judo and Wrestling -- Part 5
Shaolin Felling Techniques are unlike those of Judo and Wrestling -- Part 6
Shaolin Felling Techniques are unlike those of Judo and Wrestling -- Part 7
Shaolin Felling Techniques are unlike those of Judo and Wrestling -- Part 8
Shaolin Felling Techniques are unlike those of Judo and Wrestling -- Part 9
Shaolin Felling Techniques are unlike those of Judo and Wrestling -- Part 10
Combat Sequence 13: Fell Tree with Roots -- Part 1
Combat Sequence 13: Fell Tree with Roots -- Part 2
Combat Sequence 13: Fell Tree with Roots -- Part 3
Combat Sequence 13: Fell Tree with Roots -- Part 4
Combat Sequence 13: Fell Tree with Roots -- Part 5
Combat Sequence 13: Fell Tree with Roots -- Part 6
Combat Sequence 13: Fell Tree with Roots -- Part 7
Combat Sequence 13: Fell Tree with Roots -- Part 8
Combat Sequence 13: Fell Tree with Roots -- Part 9
Combat Sequence 13: Fell Tree with Roots -- Part 10
 A Technique to Fell an Opponent Forward, Backward
or Sideways -- Part 1
A Technique to Fell an Opponent Forward, Backward
or Sideways -- Part 2
A Technique to Fell an Opponent Forward, Backward
or Sideways -- Part 3
A Technique to Fell an Opponent Forward, Backward
or Sideways -- Part 4
A Technique to Fell an Opponent Forward, Backward
or Sideways -- Part 5
A Technique to Fell an Opponent Forward, Backward
or Sideways -- Part 6
A Technique to Fell an Opponent Forward, Backward or Sideways -- Part 7
Combat Sequence 14: Lead Horse Back to Stable -- Part 1
Combat Sequence 14: Lead Horse Back to Stable -- Part 2
Combat Sequence 14: Lead Horse Back to Stable -- Part 3
Combat Sequence 14: Lead Horse Back to Stable -- Part 4
Combat Sequence 14: Lead Horse Back to Stable -- Part 5
Combat Sequence 14: Lead Horse Back to Stable -- Part 6
Changing Shoulder Throw to Waist Throw for Compassion -- Part 1
Changing Shoulder Throw to Waist Throw for Compassion -- Part 2
Changing Shoulder Throw to Waist Throw for Compassion -- Part 3
Changing Shoulder Throw to Waist Throw for Compassion -- Part 4
Changing Shoulder Throw to Waist Throw for Compassion -- Part 5
Changing Shoulder Throw to Waist Throw for Compassion -- Part 6
Combat Sequence 15: Farmer Hoes Rice Field -- Part 1
Combat Sequence 15: Farmer Hoes Rice Field -- Part 2
Combat Sequence 15: Farmer Hoes Rice Field -- Part 3
Combat Sequence 15: Farmer Hoes Rice Field -- Part 4
Combat Sequence 15: Farmer Hoes Rice Field -- Part 5
Combat Sequence 15: Farmer Hoes Rice Field -- Part 6
Combat Sequence 15: Farmer Hoes Rice Field -- Part 7
Combat Sequence 16: Fierce Tiger Pushes Mountain -- Part 1
Combat Sequence 16: Fierce Tiger Pushes Mountain -- Part 2
Combat Sequence 16: Fierce Tiger Pushes Mountain -- Part 3
Combat Sequence 16: Fierce Tiger Pushes Mountain -- Part 4
 Combat Sequence 16: Fierce Tiger Pushes Mountain -- Part 5
Combat Sequence 16: Fierce Tiger Pushes Mountain -- Part 6
Combat Sequence 16: Fierce Tiger Pushes Mountain -- Part 7
Shaolin Felling Techniques are unlike those of Judo
and Wrestling -- Overview
Combat Sequence 13: Fell Tree with Roots -- Overview
A Technique to Fell an Opponent Forward, Backward
or Sideways -- Overview
Combat Sequence 14: Lead Horse Back to Stable -- Overview
Changing Shoulder Throw to Waist Throw for Compassion
-- Overview
Combat Sequence 15: Farmer Hoes Rice Field -- Overview
Combat Sequence 16: Fierce Tiger Pushes Mountain -- Overview
Sabah Kungfu 2009 -- Sabah 08 Deflecting Strikes and Employing Body-Movement -- Part 1
Deflecting Strikes and Employing Body-Movement -- Part 2
Deflecting Strikes and Employing Body-Movement -- Part 3
Deflecting Strikes and Employing Body-Movement -- Part 4
Deflecting Strikes and Employing Body-Movement -- Part 5
Deflecting Strikes and Employing Body-Movement -- Part 6
Deflecting Strikes and Employing Body-Movement -- Part 7
Deflecting Strikes and Employing Body-Movement -- Part 8
Deflecting Strikes and Employing Body-Movement -- Part 9
Deflecting Strikes and Employing Body-Movement -- Part 10
Deflecting Strikes and Employing Body-Movement -- Part 11
Covering an Opponent and Releasing his Grip -- Part 1
Covering an Opponent and Releasing his Grip -- Part 2
Covering an Opponent and Releasing his Grip -- Part 3
Covering an Opponent and Releasing his Grip -- Part
Covering an Opponent and Releasing his Grip -- Part 5
Covering an Opponent and Releasing his Grip -- Part 6
Covering an Opponent and Releasing his Grip -- Part 7
Covering an Opponent and Releasing his Grip -- Part 8
Covering an Opponent and Releasing his Grip -- Part 9
 Releasing Grips, Adjusting Positions, Intercepting and
Felling -- Part 1
Releasing Grips, Adjusting Positions, Intercepting and
Felling -- Part 2
Releasing Grips, Adjusting Positions, Intercepting and
Felling -- Part 3
Releasing Grips, Adjusting Positions, Intercepting and
Felling -- Part 4
Releasing Grips, Adjusting Positions, Intercepting and
Felling -- Part 5
Releasing Grips, Adjusting Positions, Intercepting and
Felling -- Part 6
Releasing Grips, Adjusting Positions, Intercepting and Felling -- Part 7
Releasing Grips, Adjusting Positions, Intercepting and Felling -- Part 8
Releasing Grips, Adjusting Positions, Intercepting and Felling -- Part 9
Body-Movement and Other Techniques -- Part 1
Body-Movement and Other Techniques -- Part 2
Body-Movement and Other Techniques -- Part 3
Body-Movement and Other Techniques -- Part 4
Body-Movement and Other Techniques -- Part 5
Body-Movement and Other Techniques -- Part 6
Body-Movement and Other Techniques -- Part 7
Body-Movement and Other Techniques -- Part 8
Monkey Fells Tree against Undercuts -- Part 1
Monkey Fells Tree against Undercuts -- Part 2
Monkey Fells Tree against Undercuts -- Part 3
Monkey Fells Tree against Undercuts -- Part 4
Monkey Fells Tree against Undercuts -- Part 5
Monkey Fells Tree against Undercuts -- Part 6
Monkey Fells Tree against Undercuts -- Part 7
Monkey Fells Tree against Undercuts -- Part 8
Monkey Fells Tree against Undercuts -- Part 9
Monkey Fells Tree against Undercuts -- Part 10
Moving in to Attack without being Hit -- Part 1
Moving in to Attack without being Hit -- Part 2
Moving in to Attack without being Hit -- Part 3
 Moving in to Attack without being Hit -- Part 4
Moving in to Attack without being Hit -- Part 5
Moving in to Attack without being Hit -- Part 6
Moving in to Attack without being Hit -- Part 7
Moving in to Attack without being Hit -- Part 8
Moving in to Attack without being Hit -- Part 9
Good Footwork for Attack and Defence -- Part 1
Good Footwork for Attack and Defence -- Part 2
Good Footwork for Attack and Defence -- Part 3
Good Footwork for Attack and Defence -- Part 4
Good Footwork for Attack and Defence -- Part 5
Good Footwork for Attack and Defence -- Part 6
Good Footwork for Attack and Defence -- Part 7
Good Footwork for Attack and Defence -- Part 8
Good Footwork for Attack and Defence -- Part 9
The Tactic of Glide, Thread and Strike -- Part 1
The Tactic of Glide, Thread and Strike -- Part 2
The Tactic of Glide, Thread and Strike -- Part 3
The Tactic of Glide, Thread and Strike -- Part 4
The Tactic of Glide, Thread and Strike -- Part 5
The Tactic of Glide, Thread and Strike -- Part 6
The Tactic of Glide, Thread and Strike -- Part 7
The Tactic of Glide, Thread and Strike -- Part 8
Deflecting Strikes and Employing Body-Movement -- Overview
Covering an Opponent and Releasing his Grip -- Overview
Releasing Grips, Adjusting Positions, Intercepting and Felling -- Overview
Body-Movement and Other Techniques -- Overview
Monkey Fells Tree against Undercuts -- Overview
Moving in to Attack without being Hit -- Overview
Good Footwork for Attack and Defence -- Overview
The Tactic of Glide, Thread and Strike -- Overview
 Sabah Kungfu 2009 -- Sabah 09
Effective Strategy against Kick-boxers and
Sabah Kungfu 2009 -- Sabah 09
Effective Strategy against Kick-boxers andTaekwondo Exponents -- Part 1
Effective Strategy against Kick-boxers and
Taekwondo Exponents -- Part 2
Effective Strategy against Kick-boxers and
Taekwondo Exponents -- Part 3
Effective Strategy against Kick-boxers and
Taekwondo Exponents -- Part 4
Effective Strategy against Kick-boxers and
Taekwondo Exponents -- Part 5
Effective Strategy against Kick-boxers and Taekwondo Exponents -- Part 6
Effective Strategy against Kick-boxers and Taekwondo Exponents -- Part 7
Effective Strategy against Kick-boxers and Taekwondo Exponents -- Part 8
Effective Strategy against Kick-boxers and Taekwondo Exponents -- Part 9
Effective Strategy against Kick-boxers and Taekwondo Exponents -- Part 10
Using Stances and Body-Movement to Counter Attacks -- Part 1
Using Stances and Body-Movement to Counter Attacks -- Part 2
Using Stances and Body-Movement to Counter Attacks -- Part 3
Using Stances and Body-Movement to Counter Attacks -- Part 4
Using Stances and Body-Movement to Counter Attacks -- Part 5
Using Stances and Body-Movement to Counter Attacks -- Part 6
Using Stances and Body-Movement to Counter Attacks -- Part 7
Combat-Sequence Set for Felling Techniques -- Part 1
Combat-Sequence Set for Felling Techniques -- Part 2
Combat-Sequence Set for Felling Techniques -- Part 3
Combat-Sequence Set for Felling Techniques -- Part 4
Combat-Sequence Set for Felling Techniques -- Part 5
Combat-Sequence Set for Felling Techniques -- Part 6
Combat-Sequence Set for Felling Techniques -- Part 7
Combat-Sequence Set for Felling Techniques -- Part 8
Intercepting or Closing and Other Strategies against Random Fighting -- Part 1
Intercepting or Closing and Other Strategies against Random Fighting -- Part 2
Intercepting or Closing and Other Strategies against Random Fighting -- Part 3
Intercepting or Closing and Other Strategies against Random Fighting -- Part 4
Intercepting or Closing and Other Strategies against Random Fighting -- Part 5
 Intercepting or Closing and Other Strategies
against Random Fighting -- Part 6
Intercepting or Closing and Other Strategies
against Random Fighting -- Part 7
Intercepting or Closing and Other Strategies
against Random Fighting -- Part 8
Intercepting or Closing and Other Strategies
against Random Fighting -- Part 9
Intercepting or Closing and Other Strategies
against Random Fighting -- Part 10
Understanding Forrmidable Muay Thai Fighters -- Part 1
Understanding Forrmidable Muay Thai Fighters -- Part 2
Understanding Forrmidable Muay Thai Fighters -- Part 3
Understanding Forrmidable Muay Thai Fighters -- Part 4
Understanding Forrmidable Muay Thai Fighters -- Part 5
Understanding Forrmidable Muay Thai Fighters -- Part 6
Understanding Forrmidable Muay Thai Fighters -- Part 7
Understanding Forrmidable Muay Thai Fighters -- Part 8
Understanding Forrmidable Muay Thai Fighters -- Part 9
Understanding Forrmidable Muay Thai Fighters -- Part 10
Understanding Forrmidable Muay Thai Fighters -- Part 11
Counters against Muay Thai Attacks -- Part 1
Counters against Muay Thai Attacks -- Part 2
Counters against Muay Thai Attacks -- Part 3
Counters against Muay Thai Attacks -- Part 4
Counters against Muay Thai Attacks -- Part 5
Counters against Muay Thai Attacks -- Part 6
Counters against Muay Thai Attacks -- Part 7
Counters against Muay Thai Attacks -- Part 8
Counters against Muay Thai Attacks -- Part 9
Counters against Muay Thai Attacks -- Part 10
Counters against Muay Thai Attacks -- Part 11
How would You Countr when your Head is Locked? -- Part 1
How would You Countr when your Head is Locked? -- Part 2
How would You Countr when your Head is Locked? -- Part 3
 How would You Countr when your Head is Locked? -- Part 4
How would You Countr when your Head is Locked? -- Part 5
How would You Countr when your Head is Locked? -- Part 6
Effective Counters against he Shoot -- Part 1
Effective Counters against he Shoot -- Part 2
Effective Counters against he Shoot -- Part 3
Effective Counters against he Shoot -- Part 4
Effective Counters against he Shoot -- Part 5
Effective Counters against he Shoot -- Part 6
Effective Counters against he Shoot -- Part 7
Effective Strategy against Kick-boxers and Taekwondo Exponents -- Overview
Using Stances and Body-Movement to Counter Attacks -- Overview
Combat-Sequence Set for Felling Techniques -- Overview
Intercepting or Closing and Other Strategies against Random Fighting -- Overview
Understanding Forrmidable Muay Thai Fighters -- Overview
Counters against Muay Thai Attacks -- Overview
How would You Countr when your Head is Locked? -- Overview
Effective Counters against he Shoot -- Overview
Sabah Kungfu 2009 -- Videos Videos from Intensive Shaolin Kungfu Course 2009 -- Overview
Horse-Riding Stance
Bow-Arrrow and False-Leg Stance
Shaolin Stances: Unicorn, Goat, Four-Six and Single-Leg
Art of Flexibile Legs
Foundation of Shaolin Kungfu -- Footwork
Mechanics of Fa-Jing orr Exploding Force
Eight Basic Hand Patterns
Linking Pattern and RRight Spacing
Right Spacing and Right Timing in Shaolin Kungfu
 Opening, Closing and Covering in Shaolin Kungfu
Some Techniques and Skills for Combat Efficiency
Tactic of No Defence Direct Counter
Subtle Flootwork and Feign Movements
Moving in to Initiate an Attack in Shaolin Kungfu
Performing aKungfu Set with Force and Speed, and Without Panting
Combat Sequences 1 and 2, and Flower Hand
Combat Sequences 3 and 4, Free Offers and Bridging Gaps
Moving to Free Choice in Shaolin Combat Training
Continuing frrom First to Second Sequence in Shaolin Combat Training
The Invisible Strike
Mastering Basic Skills in Shaolin Kungfu
Flower hand, Fake and Real, and Feign Moves
Training of Jing, Qi andd Shen or Form, Energy and Mind
Applying Shaolin Kungfu on Boxing
Exploiting the Technical Advantages Shaolin has over Boxing
Acomplihed in One Breath
Modifiying Hand-Forms and Stances to Derive Variations
Continuation, and Exploiting Force with Left Palm
Marvelous Techniques beget Marvelous Techniques
From Three Steps to one Step in Defence-cum-Counter
Just Move a Step Back to Neutralize a Seemingly Helpless Situation
The Tactic of Defence-cum-Counter
The Tactic of Flow or Leak
The Tactic of Pressing Attacks
Prressing Attack with Variations from Planned Sequence
Review of Combat Sequences 5 to 8
Tactic and Skills of Follow Through
Adding Hand-Forms to Stance in Force Training
Stance Training in Shaolin, Taijiquan, Xiungyiquan and Baguazhang
 From Slow and Graceful to Fast and Agile
Kungfu Movements with Force, Speed and Elegance
One-Finger Shooting Zen in Standing Upright Position
A Treasure in Training of Energy and Mind
Five Basic Kicks in Shaolin Kungfu
Combat Sequence 9 -- Happy Bird Hops up Branch
Pressing Attacks and Interceptions
Combat Sequence 10 -- White Horse Presents Hoof
Techniques, Speed and Skills in Shaolin Kungfu
Combat Sequence 11 -- Yellow Oriocle Drrinks Water
Some Effective Techniques and their Counters
Combat Sequence 12 -- Naughty Momkey Kicks at Tree
Hard and Soft Counters against Sweeping Kicks
Linking Combat Sequences to Form Kungfu Sets
Shaolin Felling Techniques are Similar to but unlike Judo and Wrestling
Combat Sequence 13 -- Fell Tree with Roots
A Technique to Fell an Opponent Forward, Backward or Sideways
Combat Sequence 14 -- Lead Horse Back to Stable
Changing Shoulder Throw to Waist Throw for Compassion
Combat Sequence 15 -- Farmer Hoes Rice Field
Combat Sequence 16 -- Fierce Tiger Pushes Mountain
Deflecting Strikes and Employing Body-Movement
Covering an Opponent and Releasing his Grip
Releasing Grips, Adjusting Position, Intercepting and Felling
Body-Movement and Other Techniques
Monkey Fells Tree against Undercuts
Moving in to Attack without being Hit
Good Footwork in Attack and Defence
The Tactic of Glide, Thread and Strike
Effective Strategy against Kick-Boxers and Taekwondo Exponents
 Using Stances and Body Movement to Counter Attacks
Combat Sequence Set for Felling Techniques
Intercepting or Closing, and Other Strategies against
Random Fighting
Understanding Formidable Muay Thai Fighters
Shaolin Counters against Muay Thai Attacks
How would You Counter when yourr Head is Locked
Effective Shaolin Counters against the Shoot