VIDEO-CLIPS-4m
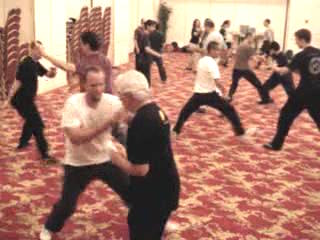
Taijiquan is Not a Dance
 Taijiquan 2008 -- Taijiquan 09
Combat Application Set 2: Green Dragon Shoots
Taijiquan 2008 -- Taijiquan 09
Combat Application Set 2: Green Dragon ShootsPearl -- Part 1
Combat Application Set 2: Green Dragon Shoots
Pearl -- Part 2
Combat Application Set 2: Green Dragon Shoots
Pearl -- Part 3
Combat Application Set 2: Green Dragon Shoots
Pearl -- Part 4
Combat Application Set 2: Green Dragon Shoots
Pearl -- Part 5
Combat Application Set 2: Green Dragon Shoots Pearl -- Part 6
What would You Do if your Kicking Leg is Held? -- Part 1
What would You Do if your Kicking Leg is Held? -- Part 2
What would You Do if your Kicking Leg is Held? -- Part 3
What would You Do if your Kicking Leg is Held? -- Part 4
What would You Do if your Kicking Leg is Held? -- Part 5
What would You Do if your Kicking Leg is Held? -- Part 6
What would You Do if your Kicking Leg is Held? -- Part 7
What would You Do if your Kicking Leg is Held? -- Part 8
What would You Do if your Kicking Leg is Held? -- Part 9
What would You Do if your Kicking Leg is Held? -- Part 10
Effective Kicking Attacks and their Defences -- Part 1
Effective Kicking Attacks and their Defences -- Part 2
Effective Kicking Attacks and their Defences -- Part 3
Effective Kicking Attacks and their Defences -- Part 4
Effective Kicking Attacks and their Defences -- Part 5
Effective Kicking Attacks and their Defences -- Part 6
Effective Kicking Attacks and their Defences -- Part 7
Effective Kicking Attacks and their Defences -- Part 8
Effective Kicking Attacks and their Defences -- Part 9
Effective Kicking Attacks and their Defences -- Part 10
The Simplicity and Profundity of Black Bear Sinks Hips -- Part 1
The Simplicity and Profundity of Black Bear Sinks Hips -- Part 2
The Simplicity and Profundity of Black Bear Sinks Hips -- Part 3
The Simplicity and Profundity of Black Bear Sinks Hips -- Part 4
 The Simplicity and Profundity of Black Bear Sinks
Hips -- Part 5
The Simplicity and Profundity of Black Bear Sinks
Hips -- Part 6
The Simplicity and Profundity of Black Bear Sinks
Hips -- Part 7
The Simplicity and Profundity of Black Bear Sinks
Hips -- Part 8
The Simplicity and Profundity of Black Bear Sinks
Hips -- Part 9
The Simplicity and Profundity of Black Bear Sinks
Hips -- Part 10
The Simplicity and Profundity of Black Bear Sinks
Hips -- Part 11
Counters against Muay Thai Knee Jabs -- Part 1
Counters against Muay Thai Knee Jabs -- Part 2
Counters against Muay Thai Knee Jabs -- Part 3
Counters against Muay Thai Knee Jabs -- Part 4
Counters against Muay Thai Knee Jabs -- Part 5
Counters against Muay Thai Knee Jabs -- Part 6
Counters against Muay Thai Knee Jabs -- Part 7
Counters against Muay Thai Knee Jabs -- Part 8
Overwheming your Opponents with Prressing Attacks -- Part 1
Overwheming your Opponents with Prressing Attacks -- Part 2
Overwheming your Opponents with Prressing Attacks -- Part 3
Overwheming your Opponents with Prressing Attacks -- Part 4
Overwheming your Opponents with Prressing Attacks -- Part 5
Overwheming your Opponents with Prressing Attacks -- Part 6
Overwheming your Opponents with Prressing Attacks -- Part 7
Counters against Pressing Attacks -- Part 1
Counters against Pressing Attacks -- Part 3
Counters against Pressing Attacks -- Part 4
Counters against Pressing Attacks -- Part
Counters against Pressing Attacks -- Part 6
Counters against Pressing Attacks -- Part 2
Counters against Pressing Attacks -- Part 7
Counters against Pressing Attacks -- Part 8
 The Mechanics of the Shoulder Strike -- Part 1
The Mechanics of the Shoulder Strike -- Part 2
The Mechanics of the Shoulder Strike -- Part 3
The Mechanics of the Shoulder Strike -- Part 4
The Mechanics of the Shoulder Strike -- Part 5
The Mechanics of the Shoulder Strike -- Part 6
The Mechanics of the Shoulder Strike -- Part 7
The Mechanics of the Shoulder Strike -- Part 8
The Mechanics of the Shoulder Strike -- Part 9
The Mechanics of the Shoulder Strike -- Part 10
The Mechanics of the Shoulder Strike -- Part 11
Starting Later but Arriving Earlier -- Part 1
Starting Later but Arriving Earlier -- Part 2
Starting Later but Arriving Earlier -- Part 3
Starting Later but Arriving Earlier -- Part 4
Starting Later but Arriving Earlier -- Part 5
Starting Later but Arriving Earlier -- Part 6
Starting Later but Arriving Earlier -- Part 7
Starting Later but Arriving Earlier -- Part 8
Starting Later but Arriving Earlier -- Part 9
Combat Sequence 11: Cloud Hands -- Part 1
Combat Sequence 11: Cloud Hands -- Part 2
Combat Sequence 11: Cloud Hands -- Part 3
Combat Sequence 11: Cloud Hands -- Part 4
Combat Sequence 11: Cloud Hands -- Part 5
Combat Sequence 11: Cloud Hands -- Part 6
Combat Sequence 11: Cloud Hands -- Part 7
Combat Sequence 11: Cloud Hands -- Part 8
Combat Sequence 11: Cloud Hands -- Part 9
Combat Sequence 11: Cloud Hands -- Part 10
Making Kungfu Alive with Fierce Dragon -- Part 1Making Kungfu Alive with Fierce Dragon -- Part 2
Making Kungfu Alive with Fierce Dragon -- Part 3
Making Kungfu Alive with Fierce Dragon -- Part 4
Making Kungfu Alive with Fierce Dragon -- Part 5
Making Kungfu Alive with Fierce Dragon -- Part 6
Making Kungfu Alive with Fierce Dragon -- Part 7
Making Kungfu Alive with Fierce Dragon -- Part 8
Making Kungfu Alive with Fierce Dragon -- Part 9
Combat Sequence 12: Carry Tiger Back to Mountain -- Part 1
Combat Sequence 12: Carry Tiger Back to Mountain -- Part 2
Combat Sequence 12: Carry Tiger Back to Mountain -- Part 3
Combat Sequence 12: Carry Tiger Back to Mountain -- Part 4
Combat Sequence 12: Carry Tiger Back to Mountain -- Part 5
Combat Sequence 12: Carry Tiger Back to Mountain -- Part 6
Combat Sequence 12: Carry Tiger Back to Mountain -- Part 7
Linking Sequences to Form a Set -- Part 1
Linking Sequences to Form a Set -- Part 2
Linking Sequences to Form a Set -- Part 3
Linking Sequences to Form a Set -- Part 4
Linking Sequences to Form a Set -- Part 5
Linking Sequences to Form a Set -- Part 6
Linking Sequences to Form a Set -- Part 7
What would You Do if your Kicking Leg is being Held? -- Overview
Effective Kicking Attacks and their Defences -- Overview
The Simplicity and Profundity of Black Bear Sinks Hips -- Overview
Counters against Muay Thai Knee Jabs -- Overview
Overwheming your Opponents with Prressing Attacks -- Overview
Counters against Pressing Attacks -- Overview
The Mechanics of the Shoulder Strike -- Overview
Starting Later but Arriving Earlier -- Overview
Combat Sequence 11: Cloud Hands -- Overview
Making Kungfu Alive with Fierce Dragon -- Overview
 Combat Sequence 12: Carry Tiger Back to
Mountain -- Overview
Linking Sequences to Form a Set -- Overview
Taijiquan 2008 -- Taijiquan 10 Learning a Set in just One Day -- Part 1
Learning a Set in just One Day -- Part 2
Learning a Set in just One Day -- Part 3
Learning a Set in just One Day -- Part 4
Learning a Set in just One Day -- Part 5
Learning a Set in just One Day -- Part 6
Applying Combat Sequences in Sparring -- Part 1
Applying Combat Sequences in Sparring -- Part 2
Applying Combat Sequences in Sparring -- Part 3
Applying Combat Sequences in Sparring -- Part 4
Applying Combat Sequences in Sparring -- Part 5
Applying Combat Sequences in Sparring -- Part 6
Applying Combat Sequences in Sparring -- Part 7
Applying Combat Sequences in Sparring -- Part 8
Applying Combat Sequences in Sparring -- Part 9
Applying Kicks and Responding to them in Taijiquan Sparring -- Part 1
Applying Kicks and Responding to them in Taijiquan Sparring -- Part 2
Applying Kicks and Responding to them in Taijiquan Sparring -- Part 3
Applying Kicks and Responding to them in Taijiquan Sparring -- Part 4
Applying Kicks and Responding to them in Taijiquan Sparring -- Part 5
Applying Kicks and Responding to them in Taijiquan Sparring -- Part 6
Applying Kicks and Responding to them in Taijiquan Sparring -- Part 7
Applying Kicks and Responding to them in Taijiquan Sparring -- Part 8
Applying Kicks and Responding to them in Taijiquan Sparring -- Part 9
Taijiquan as an Internal Martial Art -- Part 1
Taijiquan as an Internal Martial Art -- Part 2
Taijiquan as an Internal Martial Art -- Part 3
Taijiquan as an Internal Martial Art -- Part 4
Taijiquan as an Internal Martial Art -- Part 5
Taijiquan as an Internal Martial Art -- Part 6
 Taijiquan as an Internal Martial Art -- Part 7
Taijiquan as an Internal Martial Art -- Part 8
Taijiquan as an Internal Martial Art -- Part 9
Continuous Attacks and their Counters -- Part 1
Continuous Attacks and their Counters -- Part 2
Continuous Attacks and their Counters -- Part 3
Continuous Attacks and their Counters -- Part 4
Continuous Attacks and their Counters -- Part 5
Continuous Attacks and their Counters -- Part 6
Continuous Attacks and their Counters -- Part 7
Continuous Attacks and their Counters -- Part 8
Continuous Attacks and their Counters -- Part 9
Countering Opponents' Attacks at Various Points -- Part 1
Countering Opponents' Attacks at Various Points -- Part 2
Countering Opponents' Attacks at Various Points -- Part 3
Countering Opponents' Attacks at Various Points -- Part 4
Countering Opponents' Attacks at Various Points -- Part 5
Countering Opponents' Attacks at Various Points -- Part 6
Countering Opponents' Attacks at Various Points -- Part 7
Countering Opponents' Attacks at Various Points -- Part 8
Countering Opponents' Attacks at Various Points -- Part 9
Kicking Attacks and their Counters -- Part 1
Kicking Attacks and their Counters -- Part 2
Kicking Attacks and their Counters -- Part 3
Kicking Attacks and their Counters -- Part 4
Kicking Attacks and their Counters -- Part 5
Kicking Attacks and their Counters -- Part 1
Kicking Attacks and their Counters -- Part 2
Combat Application Set 3: Black Bear Sinks Hips -- Part 3
Combat Application Set 3: Black Bear Sinks Hips -- Part 4
 Combat Application Set 3: Black Bear Sinks Hips -- Part 5
Combat Application Set 3: Black Bear Sinks Hips -- Part 6
Combat Application Set 4: Carry Tiger Back to
Mountain -- Part 1
Combat Application Set 4: Carry Tiger Back to
Mountain -- Part 2
Combat Application Set 4: Carry Tiger Back to
Mountain -- Part 3
Combat Application Set 4: Carry Tiger Back to
Mountain -- Part 4
Combat Application Set 4: Carry Tiger Back to
Mountain -- Part 5
Combat Application Set 4: Carry Tiger Back to Mountain -- Part 6
Combat Application Set 4: Carry Tiger Back to Mountain -- Part 7
How to Handle Boxers Competently -- Part 1
How to Handle Boxers Competently -- Part 2
How to Handle Boxers Competently -- Part 3
How to Handle Boxers Competently -- Part 4
How to Handle Boxers Competently -- Part 5
How to Handle Boxers Competently -- Part 6
How to Handle Boxers Competently -- Part 7
The Important Roles of Footwork and Guard Hand -- Part 1
The Important Roles of Footwork and Guard Hand -- Part 2
The Important Roles of Footwork and Guard Hand -- Part 3
The Important Roles of Footwork and Guard Hand -- Part 4
The Important Roles of Footwork and Guard Hand -- Part 5
The Important Roles of Footwork and Guard Hand -- Part 6
The Important Roles of Footwork and Guard Hand -- Part 7
The Effective Tactic of Close and Strike against Boxers -- Part 1
The Effective Tactic of Close and Strike against Boxers -- Part 2
The Effective Tactic of Close and Strike against Boxers -- Part 3
The Effective Tactic of Close and Strike against Boxers -- Part 4
The Effective Tactic of Close and Strike against Boxers -- Part 5
The Effective Tactic of Close and Strike against Boxers -- Part 6
The Effective Tactic of Close and Strike against Boxers -- Part 7
 The Effective Tactic of Close and Strike against
Boxers -- Part 8
The Effective Tactic of Close and Strike against
Boxers -- Part 9
Opening an Opponent wth Jade Girl Threads
Shuttle -- Part 1
Opening an Opponent wth Jade Girl Threads
Shuttle -- Part 2
Opening an Opponent wth Jade Girl Threads
Shuttle -- Part 3
Opening an Opponent wth Jade Girl Threads
Shuttle -- Part 4
Opening an Opponent wth Jade Girl Threads
Shuttle -- Part 5
Opening an Opponent wth Jade Girl Threads Shuttle -- Part 6
Countering Undercuts with White Monkey Bends Branch -- Part 1
Countering Undercuts with White Monkey Bends Branch -- Part 2
Countering Undercuts with White Monkey Bends Branch -- Part 3
Countering Undercuts with White Monkey Bends Branch -- Part 4
Countering Undercuts with White Monkey Bends Branch -- Part 5
Countering Undercuts with White Monkey Bends Branch -- Part 6
Countering Undercuts with White Monkey Bends Branch -- Part 7
How to Handle a Boxer Bouncing around You -- Part 1
How to Handle a Boxer Bouncing around You -- Part 2
How to Handle a Boxer Bouncing around You -- Part 3
How to Handle a Boxer Bouncing around You -- Part 4
How to Handle a Boxer Bouncing around You -- Part 5
How to Handle a Boxer Bouncing around You -- Part 6
How to Handle a Boxer Bouncing around You -- Part 7
How to Handle a Boxer Bouncing around You -- Part 8
How to Handle a Boxer Bouncing around You -- Part 9
How to Handle a Boxer Bouncing around You -- Part 10
Effective Taijiquan Techniques against Boxing -- Part 1
Effective Taijiquan Techniques against Boxing -- Part 2
Effective Taijiquan Techniques against Boxing -- Part 3
Effective Taijiquan Techniques against Boxing -- Part 4
Effective Taijiquan Techniques against Boxing -- Part 5
 Effective Taijiquan Techniques against Boxing -- Part 6
Effective Taijiquan Techniques against Boxing -- Part 7
Effective Taijiquan Techniques against Boxing -- Part 8
Effective Taijiquan Techniques against Boxing -- Part 9
Limitation of Boxing Techniques for Real Fighting -- Part 2
Limitation of Boxing Techniques for Real Fighting -- Part 2
Limitation of Boxing Techniques for Real Fighting -- Part 2
Limitation of Boxing Techniques for Real Fighting -- Part 4
Limitation of Boxing Techniques for Real Fighting -- Part 5
Limitation of Boxing Techniques for Real Fighting -- Part 6
Limitation of Boxing Techniques for Real Fighting -- Part 7
Limitation of Boxing Techniques for Real Fighting -- Part 8
Taijiquan Techniques against Kick-Boxing -- Part 1
Taijiquan Techniques against Kick-Boxing -- Part 2
Taijiquan Techniques against Kick-Boxing -- Part 3
Taijiquan Techniques against Kick-Boxing -- Part 4
Taijiquan Techniques against Kick-Boxing -- Part 5
Taijiquan Techniques against Kick-Boxing -- Part 6
Taijiquan Techniques against Kick-Boxing -- Part 7
Taijiquan Techniques against Kick-Boxing -- Part 8
Taijiquan Techniques against Kick-Boxing -- Part 9
Taijiquan Techniques against Kick-Boxing -- Part 10
Taijiquan Techniques against Muay Thai -- Part 1
Taijiquan Techniques against Muay Thai -- Part 2
Taijiquan Techniques against Muay Thai -- Part 3
Taijiquan Techniques against Muay Thai -- Part 4
Taijiquan Techniques against Muay Thai -- Part 5
Taijiquan Techniques against Muay Thai -- Part 6
Taijiquan Techniques against Muay Thai -- Part 7
Taijiquan Techniques against Muay Thai -- Part 8
 Taijiquan Techniques against Muay Thai -- Part 9
Muay Thai Techniques in Taijiquan -- Part 1
Muay Thai Techniques in Taijiquan -- Part 2
Muay Thai Techniques in Taijiquan -- Part 3
Muay Thai Techniques in Taijiquan -- Part 4
Muay Thai Techniques in Taijiquan -- Part 5
Muay Thai Techniques in Taijiquan -- Part 6
Muay Thai Techniques in Taijiquan -- Part 7
Covering the Shoot and Enjoying Free Sparring -- Part 1
Covering the Shoot and Enjoying Free Sparring -- Part 2
Covering the Shoot and Enjoying Free Sparring -- Part 3
Covering the Shoot and Enjoying Free Sparring -- Part 4
Covering the Shoot and Enjoying Free Sparring -- Part 5
Covering the Shoot and Enjoying Free Sparring -- Part 6
Covering the Shoot and Enjoying Free Sparring -- Part 7
Covering the Shoot and Enjoying Free Sparring -- Part 8
Covering the Shoot and Enjoying Free Sparring -- Part 9
Learning a Set in just One Day -- Overview
Applying Combat Sequences in Sparring -- Overview
Applying Kicks and Responding to them in Taijiquan Sparring -- Overview
Taijiquan as an Internal Martial Art -- Overview
Continuous Attacks and their Counters -- Overview
Countering Opponents' Attacks at Various Points -- Overview
Kicking Attacks and their Counters -- Overview
Combat Application Set 3: Black Bear Sinks Hips -- Overview
Combat Application Set 4: Carry Tiger Back to Mountain -- Overview
How to Handle Boxers Competently -- Overview
 The Important Roles of Footwork and Guard
Hand -- Overview
The Effective Tactic of Close and Strike
against Boxers -- Overview
Opening an Opponent wth Jade Girl Threads
Shuttle -- Overview
Countering Undercuts with White Monkey Bends
Branch -- Overview
How to Handle a Boxer Bouncing around You -- Overview
Effective Taijiquan Techniques against Boxing -- Overview
Limitation of Boxing Techniques for Real
Fighting -- Overview
Taijiquan Techniques against Kick-Boxing -- Overview
Taijiquan Techniques against Muay Thai -- Overview
Muay Thai Techniques in Taijiquan -- Overview
Countering the Shoot and Enjoying Free Sparring -- Overview