VIDEO-CLIPS-4k
Wahnam Taijiquan
 Taijiquan 2008 -- Taijiquan 07
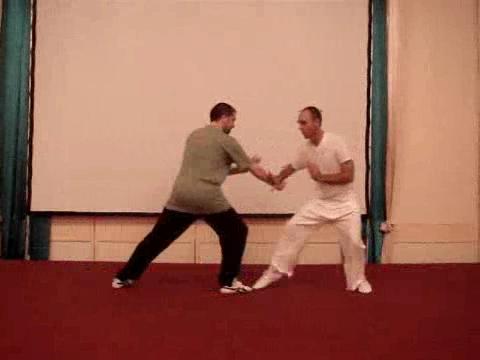
Poise Patterns and Four Modes of Prepatation -- Part 1
Taijiquan 2008 -- Taijiquan 07
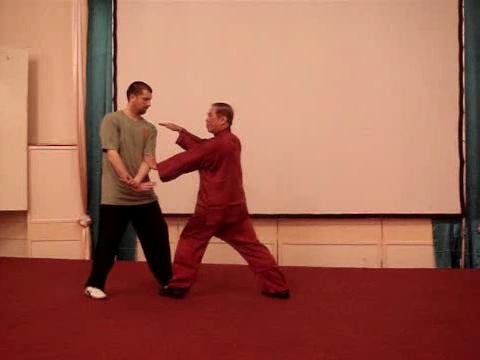
Poise Patterns and Four Modes of Prepatation -- Part 1Poise Patterns and Four Modes of Prepatation -- Part 2
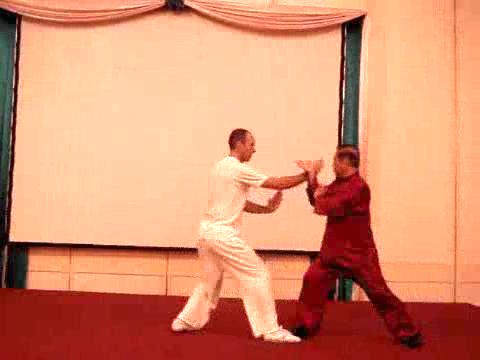
Poise Patterns and Four Modes of Prepatation -- Part 3
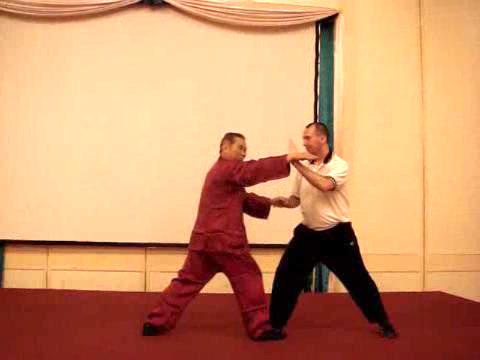
Poise Patterns and Four Modes of Prepatation -- Part 4
Poise Patterns and Four Modes of Prepatation -- Part 5
Poise Patterns and Four Modes of Prepatation -- Part 6
Poise Patterns and Four Modes of Prepatation -- Part 7
Poise Patterns and Four Modes of Prepatation -- Part 8
Poise Patterns and Four Modes of Prepatation -- Part 9
Asking the Way and Three Arrivals -- Part 1
Asking the Way and Three Arrivals -- Part 2
Asking the Way and Three Arrivals -- Part 3
Asking the Way and Three Arrivals -- Part 4
Asking the Way and Three Arrivals -- Part 5
Asking the Way and Three Arrivals -- Part 6
Asking the Way and Three Arrivals -- Part 7
Asking the Way and Three Arrivals -- Part 8
White Snake in Continuous Attacks -- Part 1
White Snake in Continuous Attacks -- Part 2
White Snake in Continuous Attacks -- Part 3
White Snake in Continuous Attacks -- Part 4
White Snake in Continuous Attacks -- Part 5
White Snake in Continuous Attacks -- Part 6
White Snake in Continuous Attacks -- Part 7
White Snake in Continuous Attacks -- Part 8
Defence-cum-Counter and Other Tactics -- Part 1
Defence-cum-Counter and Other Tactics -- Part 2
Defence-cum-Counter and Other Tactics -- Part 3
Defence-cum-Counter and Other Tactics -- Part 4
Defence-cum-Counter and Other Tactics -- Part 5
 Defence-cum-Counter and Other Tactics -- Part 6
Defence-cum-Counter and Other Tactics -- Part 7
Defence-cum-Counter and Other Tactics -- Part 8
Do you Know Why Taijiquan is Often Performed
Slowly? -- Part 1
Do you Know Why Taijiquan is Often Performed
Slowly? -- Part 2
Do you Know Why Taijiquan is Often Performed
Slowly? -- Part 3
Do you Know Why Taijiquan is Often Performed
Slowly? -- Part 4
Do you Know Why Taijiquan is Often Performed Slowly? -- Part 5
Do you Know Why Taijiquan is Often Performed Slowly? -- Part 6
Do you Know Why Taijiquan is Often Performed Slowly? -- Part 7
Do you Know Why Taijiquan is Often Performed Slowly? -- Part 8
Do you Know Why Taijiquan is Often Performed Slowly? -- Part 9
What should You do when your Opponent Hesitates -- Part 1
What should You do when your Opponent Hesitates -- Part 2
What should You do when your Opponent Hesitates -- Part 3
What should You do when your Opponent Hesitates -- Part 4
What should You do when your Opponent Hesitates -- Part 5
What should You do when your Opponent Hesitates -- Part 6
What should You do when your Opponent Hesitates -- Part 7
What should You do when your Opponent Hesitates -- Part 8
Immortal Waves Sleeves in Three Different Speeds -- Part 1
Immortal Waves Sleeves in Three Different Speeds -- Part 2
Immortal Waves Sleeves in Three Different Speeds -- Part 3
Immortal Waves Sleeves in Three Different Speeds -- Part 4
Immortal Waves Sleeves in Three Different Speeds -- Part 5
Immortal Waves Sleeves in Three Different Speeds -- Part 6
Immortal Waves Sleeves in Three Different Speeds -- Part 7
Immortal Waves Sleeves in Three Different Speeds -- Part 8
 Poise Patterns and Four Modes of Prepatation -- Overview
Asking the Way and Three Arrivals -- Overview
White Snake in Continuous Attacks -- Overview
Defence-cum-Counter and Other Tactics -- Overview
Do you Know Why Taijiquan is Often Performed Slowly?
-- Overview
What should You do when your Opponent Hesitates
-- Overview
Immortal Waves Sleeves in Three Different Speeds
-- Overview
Taijiquan 2008 -- Taijiquan 08 Some Important Lessons in Combat Sewuence 2 -- Part 1
Some Important Lessons in Combat Sewuence 2 -- Part 2
Some Important Lessons in Combat Sewuence 2 -- Part 3
Some Important Lessons in Combat Sewuence 2 -- Part 4
Some Important Lessons in Combat Sewuence 2 -- Part 5
Some Important Lessons in Combat Sewuence 2 -- Part 6
Some Important Lessons in Combat Sewuence 2 -- Part 7
Some Important Lessons in Combat Sewuence 2 -- Part 8
Some Important Lessons in Combat Sewuence 2 -- Part 9
Some Important Lessons in Combat Sewuence 2 -- Part 10
Fundamental Movement of Cloud Hands -- Part 1
Fundamental Movement of Cloud Hands -- Part 2
Fundamental Movement of Cloud Hands -- Part 3
Fundamental Movement of Cloud Hands -- Part 4
Fundamental Movement of Cloud Hands -- Part 5
Fundamental Movement of Cloud Hands -- Part 6
Fundamental Movement of Cloud Hands -- Part 7
Fundamental Movement of Cloud Hands -- Part 8
Fundamental Movement of Cloud Hands -- Part 9
Fundamental Movement of Cloud Hands -- Part 10
Fundamental Movement of Cloud Hands -- Part 11
Fundamental Movement of Cloud Hands -- Part 12
Fundamental Movement of Cloud Hands -- Part 13
From Cloud Hands to Using Mind to Direct Form -- Part 1
From Cloud Hands to Using Mind to Direct Form -- Part 2
From Cloud Hands to Using Mind to Direct Form -- Part 3
From Cloud Hands to Using Mind to Direct Form -- Part 4
From Cloud Hands to Using Mind to Direct Form -- Part 5
From Cloud Hands to Using Mind to Direct Form -- Part 6
From Cloud Hands to Using Mind to Direct Form -- Part 7
 Addition and Subtraction in Sparring Methodology -- Part 1
Addition and Subtraction in Sparring Methodology -- Part 2
Addition and Subtraction in Sparring Methodology -- Part 3
Addition and Subtraction in Sparring Methodology -- Part 4
Addition and Subtraction in Sparring Methodology -- Part 5
Addition and Subtraction in Sparring Methodology -- Part 6
Addition and Subtraction in Sparring Methodology -- Part 7
Addition and Subtraction in Sparring Methodology -- Part 8
Addition and Subtraction in Sparring Methodology -- Part 9
Addition and Subtraction in Sparring Methodology -- Part 10
Addition and Subtraction in Sparring Methodology -- Part 11
Addition and Subtraction in Sparring Methodology -- Part 12
White Snake Shoots Venom as a Pattern, a Sequence and a Set -- Part 1
White Snake Shoots Venom as a Pattern, a Sequence and a Set -- Part 2
White Snake Shoots Venom as a Pattern, a Sequence and a Set -- Part 3
White Snake Shoots Venom as a Pattern, a Sequence and a Set -- Part 4
White Snake Shoots Venom as a Pattern, a Sequence and a Set -- Part 5
White Snake Shoots Venom as a Pattern, a Sequence and a Set -- Part 6
White Snake Shoots Venom as a Pattern, a Sequence and a Set -- Part 7
White Snake Shoots Venom as a Pattern, a Sequence and a Set -- Part 8
White Snake Shoots Venom as a Pattern, a Sequence and a Set -- Part 9
White Snake Shoots Venom as a Pattern, a Sequence and a Set -- Part 10
White Snake Shoots Venom as a Pattern, a Sequence and a Set -- Part 11
White Snake Shoots Venom as a Pattern, a Sequence and a Set -- Part 12
From Patterns to Sequences to Sets -- Part 1
From Patterns to Sequences to Sets -- Part 2
From Patterns to Sequences to Sets -- Part 3
From Patterns to Sequences to Sets -- Part 4
From Patterns to Sequences to Sets -- Part 5
From Patterns to Sequences to Sets -- Part 6
 What would You Do if You were Pressed to the Edge
of a Cliff? -- Part 1
What would You Do if You were Pressed to the Edge
of a Cliff? -- Part 2
What would You Do if You were Pressed to the Edge of a Cliff? -- Part 3
What would You Do if You were Pressed to the Edge
of a Cliff? -- Part 4
What would You Do if You were Pressed to the Edge
of a Cliff? -- Part 5
What would You Do if You were Pressed to the Edge
of a Cliff? -- Part 6
What would You Do if You were Pressed to the Edge of a Cliff? -- Part 7
What would You Do if You were Pressed to the Edge of a Cliff? -- Part 8
What would You Do if You were Pressed to the Edge of a Cliff? -- Part 9
What would You Do if You were Pressed to the Edge of a Cliff? -- Part 10
What would You Do if You were Pressed to the Edge of a Cliff? -- Part 11
What would You Do if You were Pressed to the Edge of a Cliff? -- Part 12
Combat Sequence 5: White Crane Flaps Wings -- Part 1
Combat Sequence 5: White Crane Flaps Wings -- Part 2
Combat Sequence 5: White Crane Flaps Wings -- Part 3
Combat Sequence 5: White Crane Flaps Wings -- Part 4
Combat Sequence 5: White Crane Flaps Wings -- Part 5
Combat Sequence 5: White Crane Flaps Wings -- Part 6
Combat Sequence 5: White Crane Flaps Wings -- Part 7
Combat Sequence 5: White Crane Flaps Wings -- Part 8
Combat Sequence 5: White Crane Flaps Wings -- Part 9
Progression of Sequences in Combat Application -- Part 1
Progression of Sequences in Combat Application -- Part 2
Progression of Sequences in Combat Application -- Part 3
Progression of Sequences in Combat Application -- Part 4
Progression of Sequences in Combat Application -- Part 5
Progression of Sequences in Combat Application -- Part 6
Progression of Sequences in Combat Application -- Part 7
Making Good Use of our Technical Advantages -- Part 1
Making Good Use of our Technical Advantages -- Part 2
 Making Good Use of our Technical Advantages -- Part 3
Making Good Use of our Technical Advantages -- Part 4
Making Good Use of our Technical Advantages -- Part 5
Making Good Use of our Technical Advantages -- Part 6
Making Good Use of our Technical Advantages -- Part 7
Making Good Use of our Technical Advantages -- Part 8
Making Good Use of our Technical Advantages -- Part 9
Side-Step and Counter against Pressing Attack -- Part 1
Side-Step and Counter against Pressing Attack -- Part 2
Side-Step and Counter against Pressing Attack -- Part 3
Side-Step and Counter against Pressing Attack -- Part 4
Side-Step and Counter against Pressing Attack -- Part 5
Side-Step and Counter against Pressing Attack -- Part 6
Side-Step and Counter against Pressing Attack -- Part 7
Side-Step and Counter against Pressing Attack -- Part 8
Side-Step and Counter against Pressing Attack -- Part 9
Side-Step and Counter against Pressing Attack -- Part 10
Side-Step and Counter against Pressing Attack -- Part 11
Side-Step and Counter against Pressing Attack -- Part 12
An Effective Response against any Kicks -- Part 1
An Effective Response against any Kicks -- Part 2
An Effective Response against any Kicks -- Part 3
An Effective Response against any Kicks -- Part 4
An Effective Response against any Kicks -- Part 5
An Effective Response against any Kicks -- Part 6
An Effective Response against any Kicks -- Part 7
An Effective Response against any Kicks -- Part 8
An Effective Response against any Kicks -- Part 9
An Effective Response against any Kicks -- Part 10
Some Important Lessons in Combat Sewuence 2-- Overview
Fundamental Movement of Cloud Hands -- Overview
From Cloud Hands to Using Mind to Direct Form
-- Overview
Addition and Subtraction in Sparring Methodology
-- Overview
White Snake Shoots Venom as a Pattern, a Sequence
and a Set -- Overview
From Patterns to Sequences to Sets -- Overview
What would You Do if You were Pressed to the Edge
of a Cliff? -- Overview
Combat Sequence 5: White Crane Flaps Wings -- Overview
Progression of Sequences in Combat Application -- Overview
Making Good Use of our Technical Advantages -- Overview
Side-Step and Counter against Pressing Attack -- Overview
An Effective Response against any Kicks -- Overview